![]()
Winter Cover Damage: Spring Inspection & Prevention Guide
A practical guide to inspecting winter boat cover damage in spring: moisture, snow load, straps, ventilation, mold, electrical checks, documentation, and prevention steps.

Winter Cover Damage: Spring Inspection & Prevention Guide
Winter cover damage is usually discovered at the worst possible moment: when the boat is supposed to be getting ready for launch. A sagged cover, torn seam, loose strap, musty smell, damp carpet, or pooled-water stain can reveal that the storage setup did not protect the boat as well as expected.
This guide replaces panic with a practical spring inspection process. It explains what to check when removing a winter cover, which signs deserve immediate attention, how to document problems, and how to prevent the same failures next season.
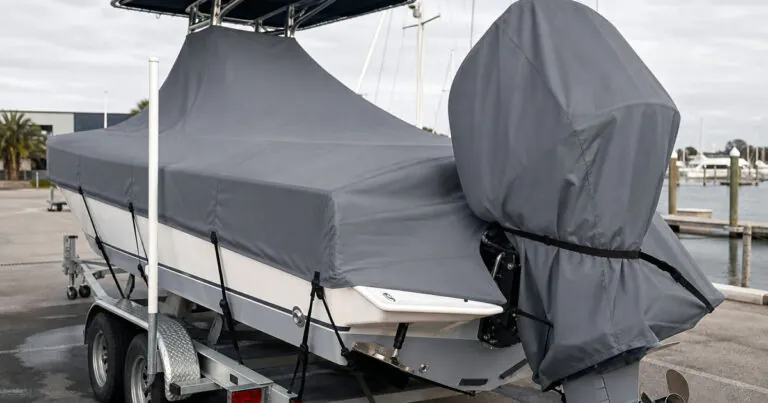
What a Failed Winter Cover Usually Looks Like
A winter cover does not have to be destroyed to fail. Sometimes the cover is still on the boat, but the fit, support, or ventilation allowed water, moisture, abrasion, or debris to affect the boat underneath.
- Low spots where rain or snowmelt pooled.
- Loose straps, cracked buckles, stretched elastic, or shifted tie-downs.
- Chafe marks around windshields, cleats, trolling motors, rub rails, or consoles.
- Condensation, mildew smell, damp carpet, or moisture inside lockers.
- Cover fabric that became brittle, stretched, torn, or heavily abraded.
- Evidence of pests entering through gaps near the transom or gunwale.
If you see any of these signs, slow down before launching. A careful inspection now can prevent a small storage issue from becoming a bigger repair later.
Step 1: Inspect Before You Remove Everything
Before pulling the cover off, take photos from several angles. Capture sagging areas, strap positions, rub points, stains, snow-load marks, and any torn fabric. These photos help you understand what failed and provide useful documentation if you later speak with a repair shop or insurer.
- Photograph the cover while still installed.
- Note where water appears to have pooled.
- Mark chafe locations with tape or photos.
- Check whether the cover stayed centered over the hull.
- Remove the cover slowly so dirt or standing water does not spill into the cockpit.
Once removed, let the boat air out before closing compartments again.
Step 2: Check Moisture, Mold, and Ventilation
Moisture is one of the most common signs that winter protection was incomplete. A cover can block direct rain but still trap damp air. That is why ventilation and drainage matter as much as fabric thickness.
Check the cockpit, compartments, under-seat areas, carpet edges, electronics bays, and storage lockers. Look for dampness, odor, mildew spots, and water stains. If the interior smells musty, do not ignore it. Dry the boat thoroughly and identify where moisture entered or accumulated.
For a deeper explanation, use the Safeboatz boat cover ventilation guide. It explains how airflow, vent placement, and support poles work together during storage.
Step 3: Inspect Electrical and Mechanical Areas Before Powering Up
Do not immediately turn on every system after winter storage. First, inspect battery terminals, wiring, lights, bilge areas, pumps, and the engine compartment. Moisture and corrosion can create problems that are easier to catch before power is applied.
- Look for corrosion around terminals and connectors.
- Check battery condition and charge level.
- Inspect bilge areas for standing water or residue.
- Look around electronics for condensation marks.
- Inspect fuel lines, hoses, and clamps as part of normal commissioning.
For broader seasonal prep, outside references such as BoatUS spring commissioning guidance are useful complements to this cover-focused checklist.
Step 4: Read the Cover Like a Storage Report Card
The condition of the cover tells you what happened over the storage season. A clean, tight, dry cover usually means the support and tension plan worked. A sagged, stretched, torn, or heavily stained cover points to a mismatch between the cover and the actual conditions.
If the cover sagged
Review support poles, drainage angle, and strap tension. A cover should shed water rather than hold it. See the snow load boat cover guide for storage support principles.
If the cover flapped or rubbed
Check fit, strap spacing, and contact points. Loose fabric can abrade gelcoat, rails, seats, and windshield corners. Padding sharp points can help, but a better-fitting cover is often the real fix.
If the boat smelled damp
Focus on airflow and whether the cover sealed too tightly without venting. Ventilation, drying time, and moisture control should be part of the next storage plan.
If straps or buckles failed
Inspect all hardware, not just the broken piece. One failed buckle may indicate UV exposure, cold brittleness, overstress, or a cover that was working too hard because fit was poor.
When to Repair, Replace, or Upgrade the Cover
A small tear, loose seam, or damaged buckle can sometimes be repaired. But if the cover repeatedly pools water, shifts in wind, no longer fits tightly, or shows widespread fabric weakness, replacement may be the better decision.
- Repair: isolated tear, one buckle failure, small seam issue, or minor chafe point.
- Replace: repeated pooling, stretched fit, large tears, brittle fabric, or frequent strap failure.
- Upgrade: outdoor winter storage, trailering use, repeated moisture problems, or a boat with high-contact accessories.
If you trailer or store outdoors, a ratchet-style system can make it easier to apply consistent tension. See the ratchet boat cover guide and the trailerable boat cover guide.
Spring Damage Documentation Checklist
If you find damage, document before cleaning or repairing. Good documentation helps with repair decisions and keeps a record for future storage planning.
- Photograph the installed cover before removal.
- Photograph damage after removal from close and wide angles.
- Save notes on moisture, odor, broken straps, torn seams, and chafe points.
- Keep receipts for cover repairs, cleaning, replacement parts, or professional inspection.
- Record what you will change next winter: support, ventilation, fit, strap routing, or fabric.
How to Prevent the Same Cover Damage Next Winter
Prevention is usually a combination of fit, support, tension, ventilation, and inspection. No single feature solves everything.
- Measure length, beam, console height, outboard position, and raised hardware before buying.
- Use support poles or framing to create drainage instead of low spots.
- Keep tension even around the hull; avoid overtightening one area.
- Vent the cover when the boat will stay covered for long periods.
- Clean and dry the boat before covering.
- Check the cover after the first major storm or temperature swing if possible.
- Store the cover dry and folded loosely after the season.
For material selection, see the Safeboatz guide to 900D marine-grade polyester boat covers. For fit checks, use how to measure a boat for a cover.
Where Safeboatz Fits
If your old cover sagged, shifted, or left repeated gaps, compare it with a tighter trailerable system. Safeboatz Storm Series options are available for 17–19 ft trailerable boats and 20–22 ft trailerable boats. You can also download the free boat protection guide before choosing your next setup.
FAQ
Should I start the boat before inspecting for winter damage?
No. Inspect the cover, interior, battery area, bilge, and visible wiring before powering systems. If you see water intrusion or corrosion, investigate before starting.
Does a thicker cover automatically prevent winter damage?
No. Fabric weight helps with abrasion and durability, but fit, support, drainage, strap tension, and ventilation are equally important.
Can a cover cause mold even if it kept rain out?
Yes. If damp air is trapped under a cover for long periods, condensation and mildew can still develop. Ventilation and drying time matter.
When should I replace a winter boat cover?
Replace it when fabric is brittle, the fit has stretched, seams repeatedly fail, water pools even with support, or the cover no longer stays secure in normal storage conditions.
What should I do with the cover after spring removal?
Rinse dirt or salt if needed, let it dry fully, inspect seams and straps, then store it dry in a breathable location. Never pack a damp cover into a sealed bag.
Final Take
Winter cover damage is not just a fabric problem. It is feedback about the entire storage setup. Use spring removal to inspect moisture, support, fit, tension, ventilation, and hardware. Fixing those weak points before next winter is the best way to avoid another frustrating launch season.
Related spring inspection resources
Winter damage checks work best when they are paired with moisture control, ventilation, and launch-season inspection. Continue with Safeboatz guides on spring commissioning, launch damage prevention, cover ventilation, and rodent damage prevention.
For neutral seasonal context, see NOAA/National Weather Service marine weather resources and the BoatUS expert advice archive.
Boating Enthusiasts — Join the Crew!
Free Boat Protection Guide Download Yours Now
Get your free copy of The Complete Boat Protection Guide — expert tips, real-world strategies, and exclusive insights from the Safeboatz team.