![]()
Spring Boat Commissioning: Cover Checks Before Launch
Spring Boat Commissioning: Cover Checks Before Launch Spring boat commissioning is the moment you learn how well winter storage worked. Before the engine s

Spring Boat Commissioning: Cover Checks Before Launch
Spring boat commissioning is the moment you learn how well winter storage worked. Before the engine starts or the boat heads to the ramp, the cover can tell you where water pooled, where straps shifted, where moisture collected, and whether the storage setup needs to change before next winter.
This checklist focuses on the cover-related part of commissioning. It does not replace engine, fuel, battery, trailer, safety-gear, or manufacturer service checks. It helps you catch storage-related problems early so the rest of commissioning starts with a clean, dry, documented boat.
Quick Answer: What Should You Check First?
Start with the cover before removing it. Photograph the installed setup, brush off debris, look for pooling, check strap positions, inspect chafe points, then remove the cover carefully and inspect moisture, mildew odor, upholstery, wiring, compartments, hardware, and trailer contact points.
Why Start With the Cover?
The cover was the first line of protection during storage. If it stayed tight, dry, and intact, the boat likely had a better storage season. If it sagged, flapped, tore, or trapped moisture, those signs tell you where to inspect next.
- A pooled-water mark shows where support or drainage failed.
- A chafe mark shows where fabric rubbed against hardware.
- A loose strap shows where tension was uneven.
- A musty odor points to ventilation or drying issues.
- A gap at the bow, windshield, or transom suggests fit or routing problems.
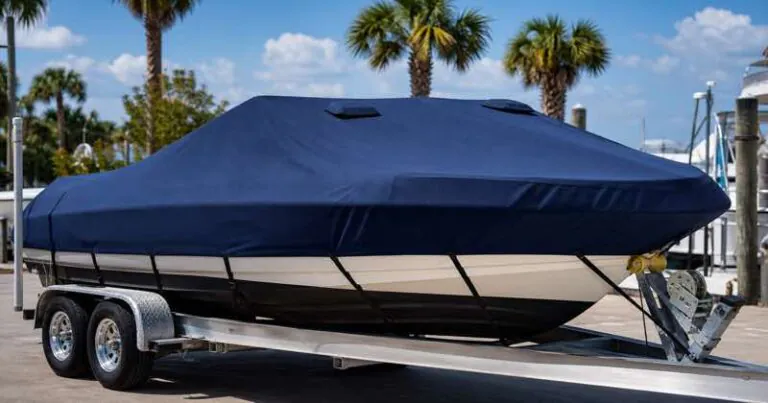
Step 1: Photograph Before Removal
Take photos from the bow, stern, both sides, cockpit, and trailer. Capture strap routing, support poles, vents, rub points, and any water marks. These photos create a reference for repairs, warranty conversations, replacement shopping, or next winter’s setup.
Step 2: Remove the Cover Carefully
- Choose a dry day if possible.
- Brush off leaves, dirt, and standing water before loosening straps.
- Release tension gradually instead of pulling from one side.
- Watch for trapped water near low points.
- Inspect the underside for mildew, abrasion, seam stress, or discoloration.
- Set the cover somewhere clean so it can dry fully before storage.
If the cover is wet, do not pack it into a sealed bag. Dry it first to reduce odor and mildew risk.
Step 3: Inspect Moisture and Ventilation
Open compartments, lockers, seats, and storage spaces. Smell matters: a musty odor may appear before visible mildew. Look for damp carpet, fogged electronics, water stains, corrosion around hardware, or swollen wood and panels.
If you find moisture, ask whether water entered from outside or damp air was trapped under the cover. A cover can shed rain and still allow condensation if the boat was stored damp or ventilation was blocked. The boat cover ventilation guide explains this balance in more detail.
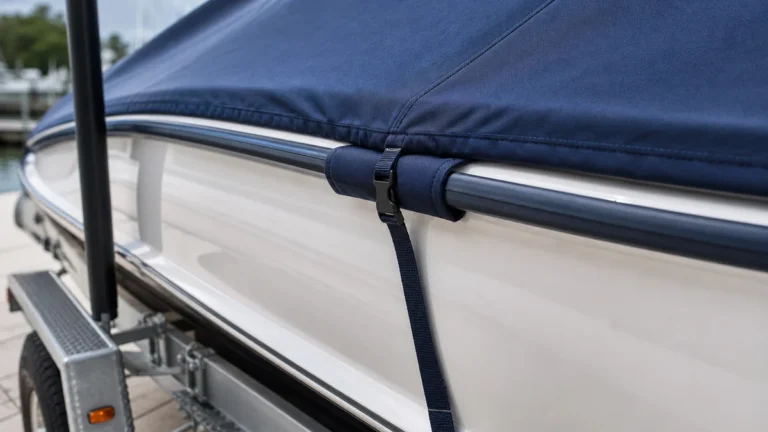
Step 4: Check Fit and Tension Marks
Spring is the best time to learn whether the cover fit correctly. Look for stretched seams, shiny rub marks, corners that were too tight, loose fabric that flapped, and support poles that moved. If the cover repeatedly pooled water, do not just tighten harder next season; improve support and slope.
If replacement may be needed, measure again with the Safeboatz measuring guide rather than copying the old cover size.
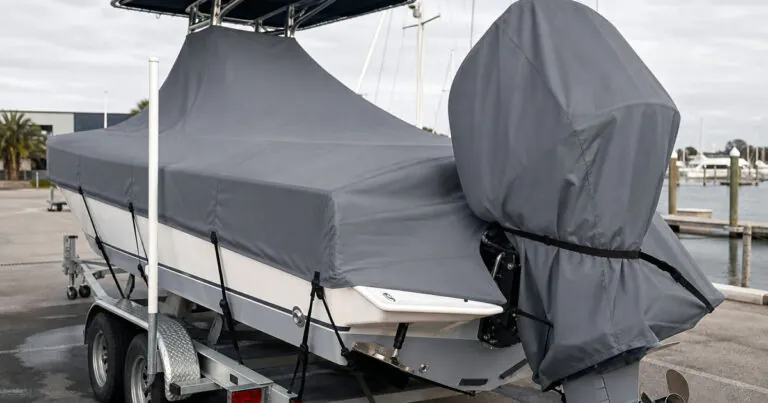
Step 5: Inspect Hardware and Contact Points
- Windshield corners and rails for fabric wear or gelcoat marks.
- Cleats, trolling-motor brackets, and bimini hardware for sharp contact.
- Snaps, buckles, straps, ratchets, and grommets for corrosion or cracking.
- Trailer brackets, winch posts, and guide poles for strap abrasion.
- Vents and poles for missing parts or blocked airflow.
Step 6: Clean and Store the Cover
Follow the cover maker’s cleaning instructions. In general, remove loose dirt first, use mild cleaning methods, rinse well, and dry completely. Avoid folding grit into the fabric. Store the cover in a dry place where rodents and moisture are less likely to reach it.
Step 7: Decide What Must Change Before Next Storage
Commissioning is not only a launch checklist; it is a lesson for next storage season. Write down what failed: support height, strap locations, ventilation, rub points, cleaning, or fit. Small changes made now prevent the same problem from repeating.
For broader spring preparation, compare your notes with trusted boating maintenance resources such as the BoatUS spring commissioning checklist.
Records to Keep After Commissioning
Keep the commissioning notes simple but consistent. Save photos of the installed cover, the dry cover after removal, any rub marks, damp areas, and hardware that needs repair. Add dates for cleaning, drying, strap replacement, seam repair, pole replacement, and any trailerable-cover adjustments. These records help you buy the right replacement later and make it easier to explain maintenance history during resale, service, or insurance conversations.
A good record also prevents repeat mistakes. If one low point collected water, mark the pole location that needs to change. If one cleat rubbed through fabric, note the exact padding solution. If a vent was blocked by folded material, photograph a better fold pattern before storing the cover.
Launch-Day Cover Checklist
- Cover dry before storage in its bag.
- Photos saved for next winter’s setup.
- Moisture and odor checks completed.
- Chafe points padded or logged for repair.
- Straps, buckles, vents, and poles inspected.
- Replacement measurements recorded if needed.
- Trailerable cover checked before any covered tow.
Where Safeboatz Fits
Safeboatz focuses on measured fit, ventilation, support, and trailerable stability. If your boat is in the current range, compare the 17–19 ft trailerable cover and 20–22 ft trailerable cover. For a printable non-product checklist, download the free Safeboatz Boat Protection Guide.
FAQ
Should I clean the cover before or after launch?
Clean and dry it as soon as practical after removal. Storing a damp, dirty cover can create odor and shorten useful life.
What if the inside of the boat smells musty?
Open compartments, dry the boat, remove damp gear, inspect for leaks, and review ventilation. Do not cover the boat again until the moisture source is understood.
Can I reuse a cover with small tears?
Small repairs may be reasonable if surrounding fabric is still strong. If fabric is brittle, stretched, or failing in multiple areas, replacement is safer.
Do I need a different checklist for trailering?
Yes. Covered towing needs a trailerable cover, balanced straps, padded contact points, and a short test drive before highway speed.
Related launch-season cover resources
Commissioning is a good time to inspect cover fabric, vents, rodent signs, straps, and trailer-readiness. Continue with Safeboatz guides on winter cover damage, spring launch inspection, storage ventilation, and rodent prevention during storage.
For neutral weather and safety context, review NOAA/National Weather Service marine weather resources and U.S. Coast Guard boating safety resources.
Boating Enthusiasts — Join the Crew!
Free Boat Protection Guide Download Yours Now
Get your free copy of The Complete Boat Protection Guide — expert tips, real-world strategies, and exclusive insights from the Safeboatz team.