 SafeBOT

How to Store a Boat Cover: Folding, Drying & Off-Season Care
A practical guide to storing a boat cover clean and dry, folding or rolling without hard creases, organizing straps and hardware, and preventing off-season mildew.

A boat cover usually gets packed away on the day you are busiest: launch day, the end of a wash, or the first warm weekend after winter storage. That is exactly when a damp seam, a gritty fold, or a loose buckle gets buried in a bag and forgotten for months.
Learning how to store a boat cover is mostly about avoiding trapped moisture and hard pressure points. Clean the cover, dry both sides, inspect the hardware, make broad folds or a loose roll, and keep it off the floor in a dry place. Those few steps make the next installation easier and give you a chance to catch damage before the cover goes back on the boat.
Quick answer: how to store a boat cover
Store a boat cover only after it is clean and completely dry. Lay it on a smooth surface, bring the sides inward without trapping straps or buckles, then make wide, loose folds or roll it if the size and care instructions allow. Put the cover in a breathable storage bag or on a clean shelf, off concrete, away from sunlight, fuel, solvents, sharp tools, rodents, and heavy items that could crush the fabric.
Start with the care instructions
Before folding anything, check the label or product instructions for the cover you own. Marine fabrics, coatings, sewn-in vents, ratchets, straps, and buckles do not all tolerate the same cleaners or storage methods. Manufacturer directions should take priority over a general routine.
If the cover has removable poles, vent caps, straps, or hardware, note where each part belongs before taking the system apart. A few phone photos of the installed cover and strap routing can save a frustrating hour next season. Keep the photos with the boat records rather than trusting yourself to remember which strap crossed where.
Clean the cover before it goes into a bag
Sand, road grit, salt residue, pollen, leaves, and bird droppings should not spend the off-season pressed into the fabric. Brush off loose debris before adding water. If the cover needs washing, use the method allowed by its care instructions, rinse away the cleaner, and check the underside as carefully as the weather-facing side.
Pay extra attention to hems, reinforced corners, strap exits, seams, and the low areas that collected water. Debris hides there. The Safeboatz guide on how to clean a boat cover walks through mild soap, rinsing, mildew checks, and water-repellency testing without treating every stain as a reason for aggressive chemicals.
Dry the panels, seams, and folded edges
A cover can feel dry across the main panels while the hems and reinforced corners still hold moisture. Open the cover over a clean support, a smooth line, or the boat itself so air reaches both sides. Flip or reposition it if one surface stays shaded. Do not use a hot dryer or direct heat unless the cover maker allows it.
Run a dry hand along seams, under folded hems, around vents, and inside storage pockets before packing. A musty smell is also a warning. If any section still feels cool and damp, keep drying. The EPA’s general mold-prevention guidance is written for buildings, not marine covers, but its basic moisture rule is useful here: wet materials need to be dried promptly, and moisture control is the foundation of prevention. See the EPA mold prevention guidance.
Inspect before the damage disappears inside the fold
Storage is the best time to inspect the full cover because the fabric is clean and you can reach both sides. Look for problems that will be hard to see once the cover is installed:
- Loose or pulled stitching along seams and hems
- Small tears, pinholes, or shiny abrasion marks
- Stretched corners or distorted attachment points
- Frayed straps, cracked buckles, bent hooks, or rough ratchet edges
- Dark areas that still smell damp after cleaning
- Coating that feels brittle, flakes, or separates from the fabric
Mark repairs now. Do not bury a torn seam and promise to remember it in spring. Photograph the area, note the location, and keep any approved repair material with the cover. If the same spot rubs every season, the problem may be cover movement or fit rather than the fabric alone. The Safeboatz boat cover chafing guide explains how to separate contact-point protection from fit and tension problems.
Fold or roll without crushing the hardware
There is no single perfect fold for every cover shape. The goal is a manageable package with broad bends instead of sharp creases, and with hard parts kept away from the fabric. Use a clean driveway tarp, workshop floor covering, or other smooth surface that will not add grit while you work.
- Spread the dry cover with the underside facing up and straighten twisted sections.
- Detach removable straps if the cover instructions allow it. Coil and label them separately.
- Bring the sides toward the center in wide sections. Keep hooks, ratchets, and buckles from being trapped between fabric layers.
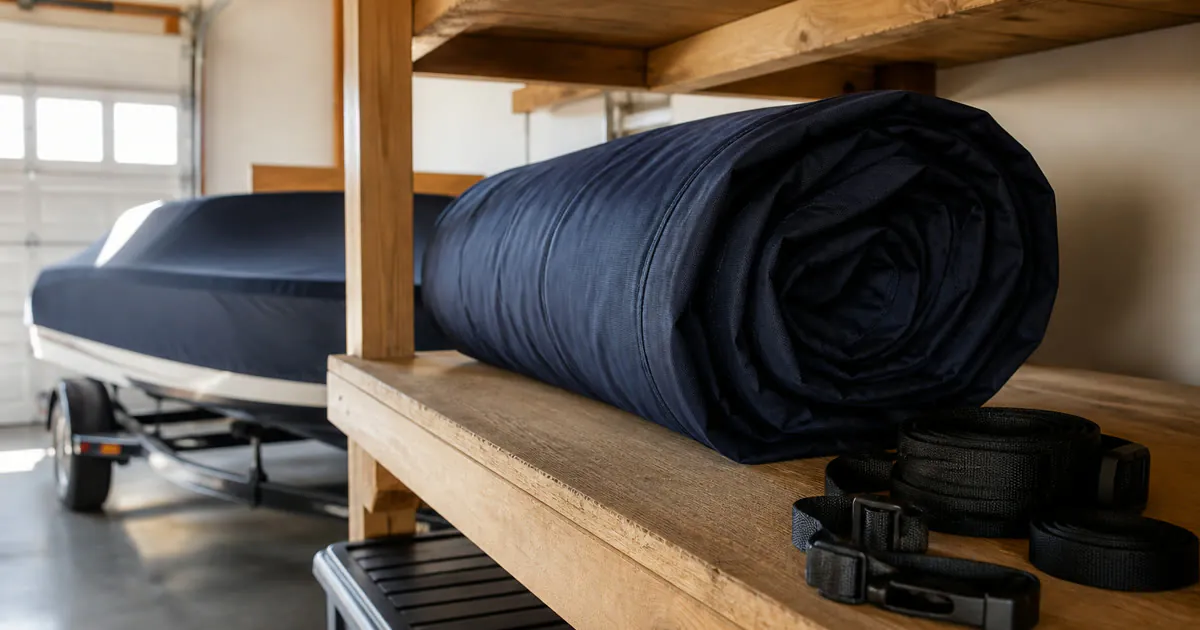
- Fold loosely from the stern end toward the bow, or roll the cover around a broad soft core if that method suits the fabric and available space.
- Stop if the package becomes so tight that seams, vents, or reinforced corners are sharply bent.
For a large cover, a second person helps keep the fabric off the ground and makes the fold more even. Do not drag the cover across trailer hardware, rough concrete, or gravel just to line up the edges.
Keep straps and buckles organized
Loose hardware can turn a storage bag into a wear point. Coil straps without tight knots, close buckles so they do not snag, and protect hooks or ratchet handles from rubbing directly against the cover. If the components are removable, a small breathable pouch inside the main bag keeps the set together without pressing metal into the fabric.
Label parts by position if the system has several similar straps. Plain tags such as bow port, bow starboard, midship, and stern are more useful next season than a pile of identical black webbing. Replace frayed straps or damaged hardware before storage if approved replacements are available. A temporary knot is not a repair plan for a covered tow.
Choose a dry, elevated storage location
A breathable bag helps keep dust off while allowing residual humidity to escape, but the room around the bag still matters. Use a shelf or rack in a dry garage, workshop, or storage area. Keep the cover off bare concrete and away from roof leaks, damp walls, direct sunlight, fuel cans, oil, solvents, batteries, sharp garden tools, and hot equipment.
Do not stack tires, anchors, toolboxes, or heavy bins on top of the stored cover. Weight can set hard creases, distort vents, and press buckles into the fabric. Leave enough space to lift the cover out without pulling it past nails, shelf brackets, or sharp corners.
Rodents are another reason to keep the package clean, elevated, and easy to inspect. Food residue, nesting material, and an untouched corner invite trouble. If pests are common in the building, check the area during the off-season rather than sealing the cover away and assuming it is safe.
Avoid the airtight-bin shortcut
An airtight plastic tote looks tidy, but it also traps whatever moisture went in with the cover. If the fabric is not unquestionably dry, use a breathable bag or leave the cover open longer before packing. A tote may still be useful for pest or dust control in a reliably dry, conditioned space, but do not mistake the lid for moisture management.
Likewise, do not put a damp cover into a plastic trash bag for a few days and forget it. If weather forces a temporary pack-up, unpack and dry the cover as soon as practical. Treat that bag as transport, not storage.
Make next season’s installation easier
A good storage routine should end with a clean restart. Keep the cover photos, measurements, repair notes, and strap map together. Store support poles and vent parts where they will not disappear behind other gear. Add a reminder to inspect the package once during a long layup, especially after a roof leak, flood, pest problem, or major humidity change in the storage area.
When the boat is ready to be covered again, inspect the fabric before installation and check that no hardware went missing. Re-center the cover, balance the tension, and keep ventilation paths open. The boat cover vents and moisture-control guide explains why a dry cover still needs airflow once it is back on the boat.
Boat cover storage checklist
- Care instructions checked
- Top and underside cleaned
- Seams, hems, corners, and pockets fully dry
- Fabric, stitching, vents, straps, and hardware inspected
- Repair locations photographed and logged
- Straps coiled and hard parts separated from fabric
- Cover folded broadly or rolled loosely
- Breathable bag or clean shelf used
- Package stored off the floor with nothing heavy on top
- Photos, measurements, and installation notes saved
FAQ: storing a boat cover
Should you fold or roll a boat cover?
Either can work if the cover is clean, dry, and handled without sharp creases. Rolling reduces repeated fold lines but needs more storage length. If you fold, use broad loose sections and keep buckles or hooks out from between fabric layers.
Can you store a boat cover in a plastic tote?
Only when the cover and storage area are reliably dry. An airtight tote can trap residual moisture. A breathable storage bag on an elevated shelf is the safer default for many off-season storage spaces.
How dry should a boat cover be before storage?
The entire cover should be dry, including the underside, seams, hems, reinforced corners, vents, and pockets. If any area feels cool, damp, or musty, keep drying before you fold or bag it.
Where should you store boat-cover straps?
Coil removable straps loosely and keep them in a breathable pouch with the cover. Close buckles, protect hooks, and label positions when the strap layout is not obvious. Do not let hard hardware press directly into folded fabric.
What should you do if the cover smells musty after storage?
Unpack it in a ventilated area, inspect both sides for moisture and mildew, and follow the cover maker’s cleaning instructions. Do not reinstall or repack it until it is clean and fully dry. Also inspect the shelf, bag, and room for the moisture source.
Bottom line
Store a boat cover clean and completely dry, with broad folds, separated hardware, and no weight on top. A breathable bag on a dry shelf is better than forcing the cover into the smallest possible package. When the boat needs protection again, you can unpack a cover that is ready for inspection and installation instead of finding months-old moisture or hidden damage.
If storage inspection shows that the old cover is stretched, repeatedly chafed, or no longer matches the boat, measure again before replacing it. Safeboatz currently offers Storm Series trailerable covers for 17-19 ft boats and 20-22 ft boats. You can also use the free boat protection guide to review fit, storage, and trailering basics first.
Boating Enthusiasts — Join the Crew!
Free Boat Protection Guide Download Yours Now
Get your free copy of The Complete Boat Protection Guide — expert tips, real-world strategies, and exclusive insights from the Safeboatz team.