 SafeBOT

How to Clean a Boat Cover: Soap, Mildew & Re-Waterproofing Checks
A practical guide to cleaning a boat cover with mild soap, mildew checks, drying, re-waterproofing tests, and Storm Series fit links before storage or trailering.

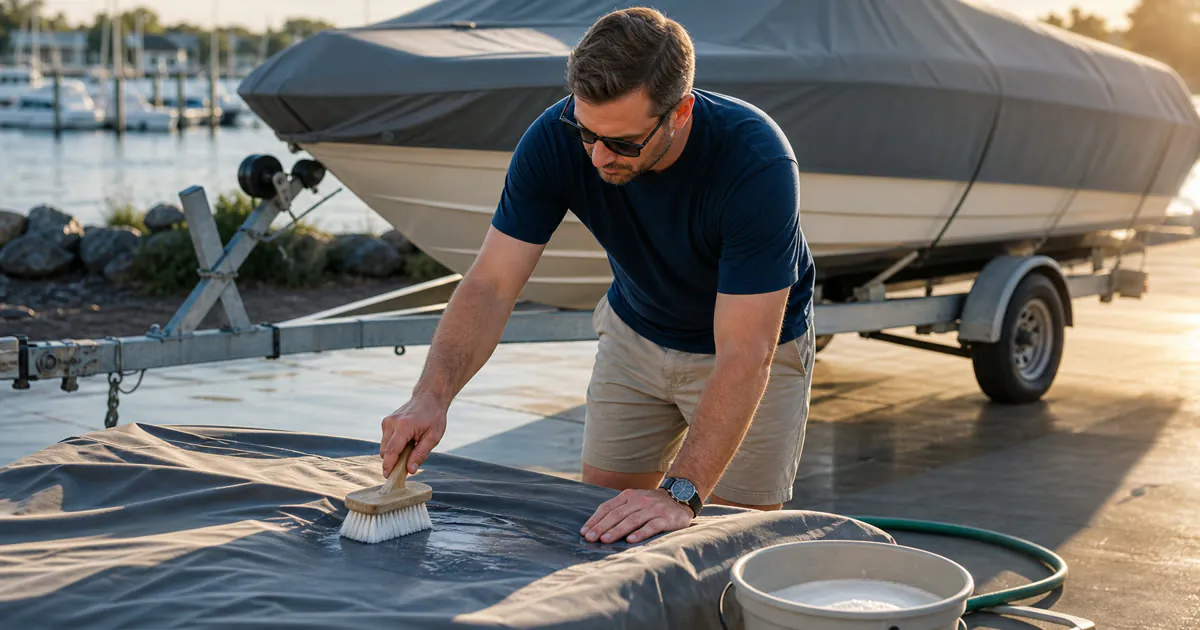
A dirty boat cover is more than a cosmetic problem. Salt, pollen, bird droppings, leaf tannins, road grit, and mildew can grind into the fabric, weaken water repellency, and leave stains that get harder to remove every month. The safest way to clean a boat cover is slow and boring: brush off loose debris, use mild soap, rinse thoroughly, dry it completely, and check whether the fabric still sheds water before putting it back into storage.
This guide explains how to clean a boat cover without damaging the fabric or turning a storage problem into a fit problem. It is written for trailerable boat owners who use a fitted cover through sun, rain, highway towing, driveway storage, and shoulder-season weather. The same routine works whether you are caring for a Safeboatz Storm Series cover or checking an older cover before replacing it.
Quick answer: how to clean a boat cover safely
To clean a boat cover, remove it from the boat when practical, shake or brush off loose debris, scrub stained areas with mild soap and lukewarm water, rinse until the runoff is clear, then let the cover dry fully before folding or reinstalling it. Avoid harsh bleach, pressure-washer blasts, stiff wire brushes, and hot dryers unless the cover manufacturer specifically allows them.
Start with the label and the fabric condition
Before you mix soap, read the care label or product page for the cover you own. Some covers allow machine washing. Others should be hand washed only. Some coatings lose performance if they are scrubbed too hard or exposed to the wrong cleaner. If the label gives a specific cleaning method, follow that first.
Then inspect the cover like a piece of gear, not laundry. Look for worn seams, cracked coatings, pulled stitching, stretched corners, weak tie-down points, and shiny rub marks. If the fabric is already brittle or delaminating, heavy cleaning may expose damage that was already there. That is still useful information, but it changes the plan from care to replacement.
What you need before cleaning
Keep the kit simple. Most boat-cover cleaning jobs do not need aggressive chemicals.
- A soft brush or broom for dry debris
- A bucket of lukewarm water with mild soap
- A soft sponge or non-abrasive brush for stains
- A garden hose for a full rinse
- A clean driveway, tarp, or smooth surface where grit will not scratch the fabric
- Enough drying time before the cover is folded or stored
Avoid cleaning the cover on gravel, rough concrete, dirty dock boards, or over sharp hardware. If you clean the cover while it is still on the boat, protect vinyl seats, electronics, glass, and brightwork from soapy runoff.
Step 1: remove dry debris first
Dry debris does the most damage when you add water too soon. Leaves, sand, pine needles, and road dust turn into paste and get pushed deeper into seams. Brush the cover from the high points toward the edges before washing. Pay attention to folds, strap exits, vent openings, and the low pockets where debris collects after rain.
If your cover has been sagging or pooling, debris will usually sit in the same low spots. Cleaning helps, but it will not fix the cause. Use the Safeboatz guide to boat cover vents and moisture control to check slope, support, and airflow after the fabric is clean.
Step 2: wash with mild soap, not harsh chemicals
Use mild soap and lukewarm water unless the manufacturer recommends a dedicated fabric cleaner. Work in sections. Let the soap loosen dirt, then scrub with a soft brush using steady pressure. Do not attack one stain until the fabric surface looks fuzzy or worn. If a stain remains after a reasonable pass, rinse, dry, and reassess instead of escalating blindly.
Bird droppings, tree sap, and oily road film may need a second pass. Keep the cleaner targeted and rinse thoroughly. Leftover soap can attract more dirt and may interfere with water repellency. That rinse matters more than most owners think.
Step 3: treat mildew carefully
Mildew usually means the cover was stored damp, ventilation was poor, or organic debris sat on the fabric long enough to feed growth. Scrub visible spots with the mildest cleaner that works for your fabric. If the cover label allows a stronger mildew cleaner, test it on a hidden area first and rinse completely.
Do not fold a cover that smells damp or musty. Dry it in open air first. For general mold and moisture guidance, the EPA mold resource center is a useful reference. On a boat cover, the practical rule is simple: clean the surface, remove the moisture source, and improve airflow before storage.
Step 4: rinse longer than you think
Rinse from the centerline out to the edges. Keep going until there is no soap feel under your fingers and the runoff looks clear. Flip the cover if needed and rinse the underside too, especially if the inside has collected dust, mildew odor, or salt residue. Any soap left inside the cover can sit against seats, gelcoat, hardware, or the cover coating once the boat is wrapped again.
Do not use a narrow pressure-washer jet unless the cover maker explicitly approves it. A strong jet can force water under coating layers, stretch seams, and damage stitching. A garden hose and patience are safer for most owners.
Step 5: dry the cover completely
Drying is part of the cleaning job. Hang the cover over a smooth rail, line, or clean support so air reaches both sides. If you dry it on the boat, keep the cover tensioned enough to shed water and open areas where air can move. Do not store the cover in a bag while it still feels cool and damp inside the folds.
After saltwater use or wet trailering, give the cover extra time. A cover can look dry on top while seams, hems, and reinforced corners still hold moisture. Those are the areas that create the musty smell later.
When to re-waterproof a boat cover
Cleaning can reveal whether the fabric still sheds water. Once the cover is dry, sprinkle water on several areas: the top panel, seams, corners, and spots that saw heavy sun or pooling. If water beads and rolls off, the repellency is still working. If it soaks in quickly or leaves dark wet patches, the cover may need a fabric-safe re-waterproofing treatment or replacement.
Use only a treatment compatible with the fabric and coating. Follow the product directions for a clean, dry surface, ventilation, cure time, and overspray protection. Do not re-waterproof a dirty cover. You may seal stains and grime into the fabric.
If the cover is stretched, torn, or no longer fits tightly, waterproofing spray will not solve the main problem. A cover that leaks because water sits in a low pocket needs slope and support. A cover that lets wind underneath needs better fit and tension. The Safeboatz guide to boat cover chafing can help you separate water problems from movement problems.
Cleaning a cover before trailering
Before a long tow, the cover should be clean enough that trapped grit will not rub the gelcoat or hardware. Check the inside surface where the fabric touches the bow, windshield frame, console, cleats, and stern corners. Dirt at those points can create rub marks even when the cover fit is good.
Clean fabric also makes strap and fit problems easier to see. After reinstalling the cover, tension the straps, check the ratchet path, and look for loose panels that could flap at road speed. The Safeboatz 900D vs 1200D boat cover guide explains why fabric strength matters, but fit and movement still decide how the cover behaves on a trailer.
Storage habits that keep the cover cleaner
- Let the cover dry before folding it into a bag or bin.
- Store it away from gasoline, oil, solvents, sharp tools, and rodents.
- Shake out leaves and grit before they sit through a wet week.
- Check support poles and vents after storms so water does not sit in one pocket.
- Clean small stains early instead of waiting for an end-of-season rescue job.
Weather can change fast around launch ramps and coastal storage areas. Before a tow day or a storage check, use reliable weather sources such as the National Weather Service safety page and inspect the cover after strong wind or heavy rain.
When cleaning is not enough
A cover that keeps staining in the same places may have a support problem. A cover that leaks after cleaning and re-treatment may have worn coating, damaged seams, or fabric that has aged out. A cover that moves while towing may be the wrong size or may need a better tie-down system. Cleaning helps you see these problems clearly. It does not hide them.
If you are replacing a worn cover on a trailerable boat, start with current fit and size instead of copying the old label. Safeboatz currently offers Storm Series trailerable covers for 17-19 ft boats and 20-22 ft boats. Measure your boat first, then match the cover to the real length, beam, console height, and storage use.
FAQ: cleaning a boat cover
Can you wash a boat cover in a washing machine?
Only if the cover label or manufacturer says machine washing is allowed. Many fitted marine covers are safer to hand wash because machines can stress seams, coatings, straps, and hardware.
What soap should you use on a boat cover?
Use mild soap and lukewarm water unless the cover maker recommends a specific fabric cleaner. Avoid harsh bleach, solvents, and abrasive cleaners unless the care instructions explicitly allow them.
How do you remove mildew from a boat cover?
Brush off debris, wash the stained area with a fabric-safe cleaner, rinse thoroughly, and dry the cover completely. If mildew keeps returning, improve airflow and stop storing the cover damp.
Should you re-waterproof a boat cover after cleaning?
Re-waterproof only if the clean, dry fabric no longer sheds water and the cover maker allows a compatible treatment. If water pools because the cover sags, fix the support and fit first.
Can you pressure wash a boat cover?
Avoid pressure washing unless the manufacturer allows it. A concentrated jet can damage coatings, seams, and stitching. A garden hose, mild soap, and a soft brush are safer for most covers.
Bottom line
Clean a boat cover before dirt becomes part of the fabric. Use mild soap, rinse well, dry it fully, and check whether water still beads before the next storage stretch. If cleaning reveals sagging, rub marks, leaking seams, or a poor fit, treat those as cover-system problems, not just stains.
For a full cover routine, pair cleaning with fit checks, ventilation, and the right size. Start with the Safeboatz trailerable boat cover overview or download the free boat protection guide before your next storage season.
Boating Enthusiasts — Join the Crew!
Free Boat Protection Guide Download Yours Now
Get your free copy of The Complete Boat Protection Guide — expert tips, real-world strategies, and exclusive insights from the Safeboatz team.