![]()
Winter Boat Cover Guide: Fit, Materials & Care for Owners
Winter Boat Cover Buying & Care Guide: Fit, Materials, Tips
Winter boat cover should be the first item on your checklist when temperatures fall and storms approach, because a proper cover protects hulls, electronics, and interiors through freeze, snow, and UV exposure. In this guide you’ll get clear goals, material comparisons, measuring steps, installation sequences, and seasonal care tips so you pick the right winter boat cover and make it last. You’ll also find targeted checklists and examples for trailered, moored, on‑lift, and rack storage scenarios, plus links to a measuring guide and official weather planning from the National Weather Service.
Why a winter boat cover matters and how to set goals
A winter boat cover does more than hide your boat from view; it prevents costly damage from snow load, freeze/thaw cycles, UV fade, and pests. Set clear goals before you buy: protect hull and rigging, prevent water pooling, allow ventilation, and secure against wind. Priorities shift by storage type — a moored vessel needs breathability to avoid condensation while a trailered boat needs abrasion resistance and secure fastening for highway and storm winds. Use the quick goal checklist below to define what you need.
- Protect hull and rigging
- Prevent water pooling
- Allow ventilation
- Be windproof
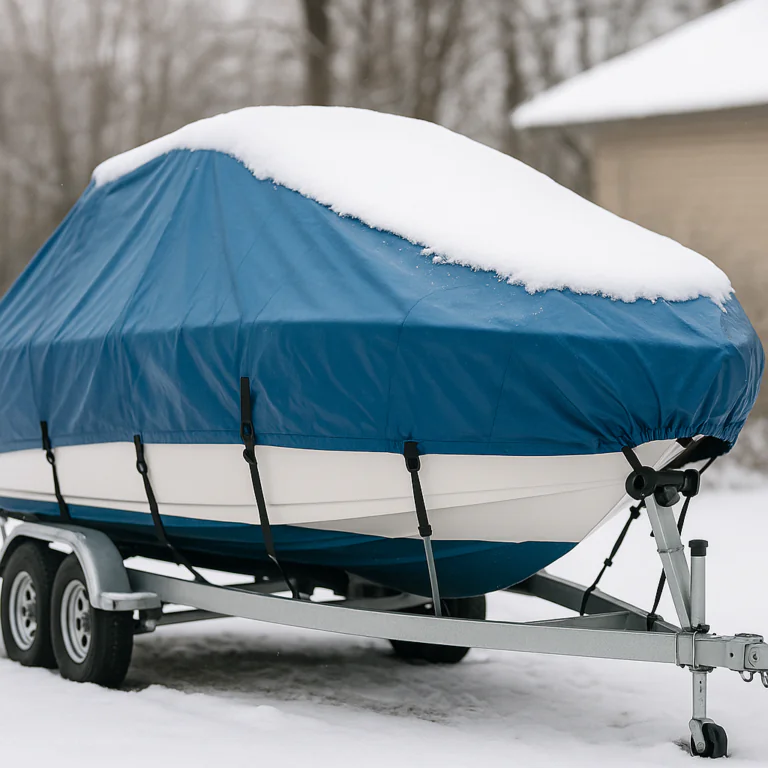
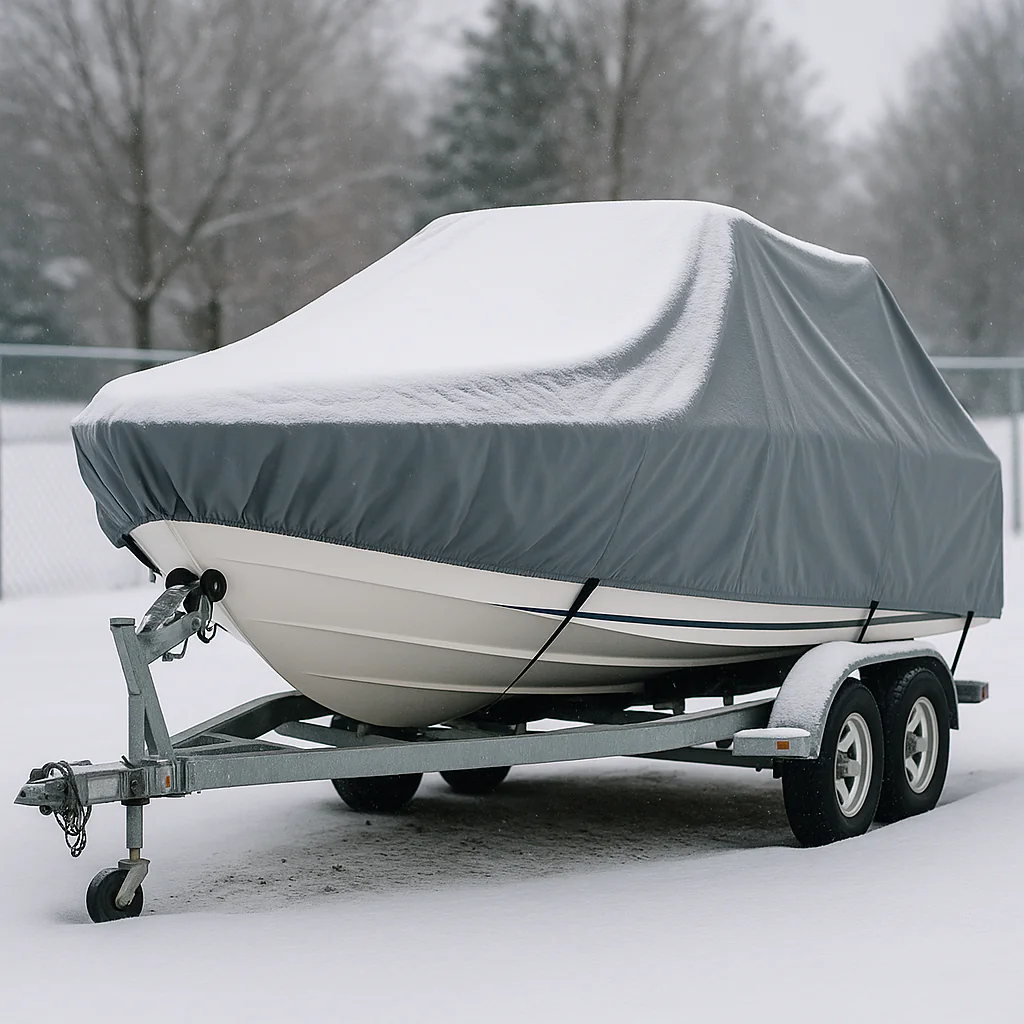
Common winter risks are measurable: wet snow weight, freeze/thaw expansion, and trapped moisture that leads to mildew. For example, heavy wet snow can load a flat cover with thousands of pounds, so plan structural support or slopes to shed snow. If ventilation is poor, condensation forms, then freezes, and causes gelcoat cracks. Consider warranty and repairability as part of lifecycle planning — a cheap tarp that traps moisture may cost you more in restoration than a mid-range breathable fitted cover. A practical decision checklist looks like this:
- Storage type: moored, trailered, on‑lift, or rack
- Access needs: frequent access favors removable fitted covers over shrink-wrap
- Budget vs longevity: custom sewn lasts longer but costs more
Example scenarios: a lakeside moored sailboat often benefits from a boom tent to shed snow without a full frame; a trailer-stored runabout needs reinforced skirts and ratchets for windproofing; a marina slip may need breathable fabric and vents to avoid interior mildew. Pro tip: prioritize ventilation for enclosed boats and abrasion resistance for trailer use. Common mistakes include choosing the cheapest cover without vents, picking the wrong style for repeated access, and ignoring attachment points or trailer clearance. For measurement and fit details see the winter cover overview.
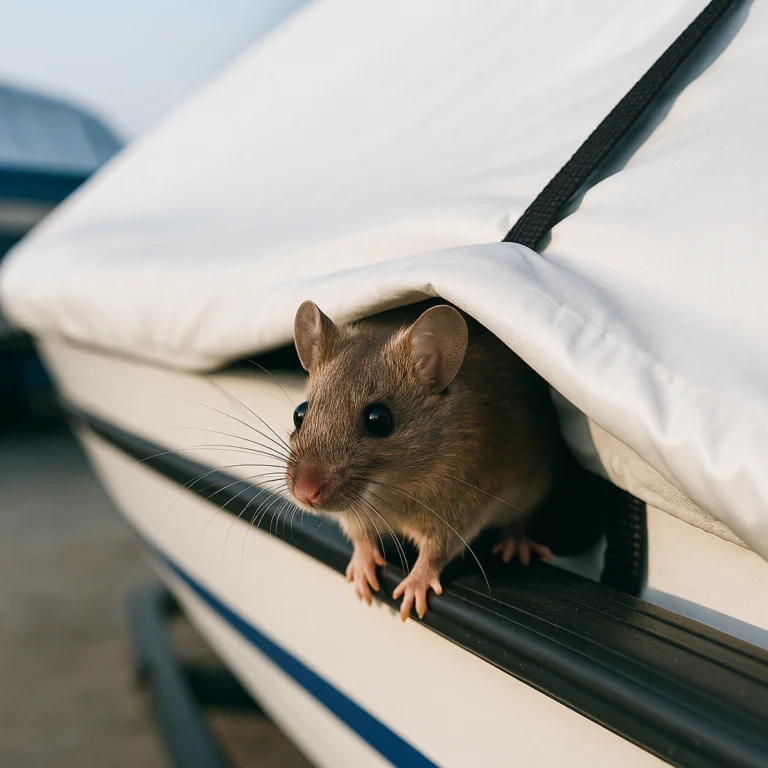
Risks of inadequate winter protection (ice, snow, UV, pests)
Inadequate winter protection leads to predictable failures: pooled water that freezes into ice dams, UV that breaks down fabrics and gelcoat, rodents nesting in bilges, and mildew from trapped humidity. A quality winter boat cover reduces these risks by combining water-shedding fabric, ventilation, and structural support. Inspect annually and after storms to catch early damage.
Define your storage scenario: trailered, on-lift, moored, or rack
Your storage scenario changes the cover features that matter most. Trailering calls for reinforced lower patches and secure fasteners; mooring demands vents and breathable fabric; on-lift storage benefits from top protection and less need for severe windproofing; rack storage often uses fitted covers that tuck under hull contours. Match design to scenario to avoid common failures.
Budget, longevity, and warranty considerations
Budget influences material and build quality. Expect longer warranties on custom sewn covers and premium fabrics. Factor repairability: canvas and sewn polyester are repairable while single-use shrink-wrap is not. Check exclusions for wind and improper installation to avoid surprises when you need a claim.
When to choose custom vs off‑the‑shelf vs shrink-wrap
Choose custom when you need precise fit and longevity; off‑the‑shelf fitted covers suit common hull shapes at a moderate price; shrink-wrap is for long-term storage with no access and can trap condensation unless vented. Consider reuse: a custom sewn or heavy duty waterproof cover is a better investment for multiple seasons.
Materials, styles, and which is best for your boat
Understanding materials is crucial to selecting a winter boat cover that lasts. Fabrics differ in breathability, UV resistance, waterproofing, and repairability. Match material to climate: heavy snow zones need strong, water-shedding surfaces and support frames; sun-heavy climates prioritize UV-resistant, solution-dyed polyester to avoid fading. Use this comparison checklist when evaluating options.
- Marine canvas — durable and breathable, easy to repair
- Solution-dyed polyester — UV resistant and long-lasting
- Polyethylene tarps — cheap and waterproof but can trap moisture
- Mesh — good for shade and airflow, not for heavy winter storms
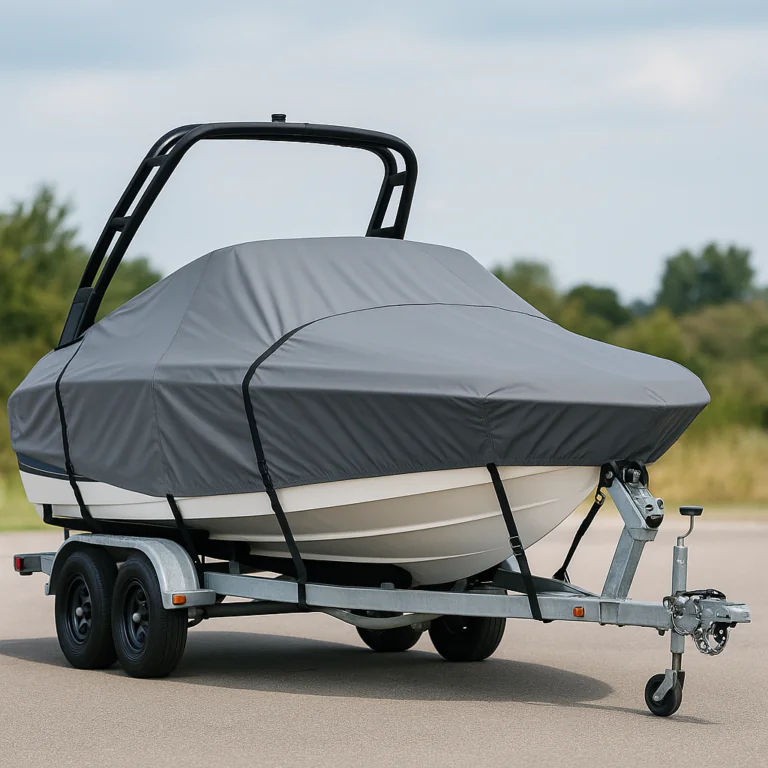
Cover styles include fitted full covers, boom tents, cockpit covers, tarps, and shrink-wrap. Each has trade-offs: fitted covers balance protection and access; boom tents add snow-shedding geometry for sailboats; shrink-wrap gives a tight waterproof shell with poor ventilation and difficult access. A useful rule: if you need frequent access or long-term reuse, avoid shrink-wrap.
Practical specs to check: hydrostatic head rating for water resistance, denier or fabric weight for durability, UV rating for fade resistance, and reinforced stress points for longevity. Look for double-stitched seams and quality grommets. A pro tip is to demand 5% shrink allowance in custom cuts so the cover fits snugly at installation.
Common materials explained: canvas, polyester, polyethelyne, mesh
Canvas breathes, resists tearing, and can be patched or restitched; polyester is strong and UV-stable when solution-dyed; polyethylene provides cheap waterproofing but is less breathable and harder to repair; mesh is for ventilation and shade but not heavy winter protection. Choose based on climate and reuse plans.
Cover styles: full fitted, boom tent, cockpit covers, tarps, shrink-wrap
Full fitted covers are versatile and secure; boom tents work well for sailboats with spars; cockpit covers protect interior areas; tarps are low-cost but often underperform in storms; shrink-wrap is effective short-term but impractical for repeated access or long-term moisture control. Use fitted or custom boom tents for most winter scenarios.
Breathability, water-shedding, UV resistance, and mildew control
Breathability prevents trapped moisture; water-shedding surfaces and sloped support stop pooling; UV-resistant coatings slow fabric breakdown; mildew control comes from dry storage and vents. If a fabric claims both waterproof and breathable, verify that it includes vents or a breathable laminate, not just a marketing phrase.
Structural support options: frames, poles, boom supports, cradles
Support systems prevent sagging and snow pooling. Options include temporary poles, lightweight frames, or permanent cradles. For sailboats, boom supports or a ridge pole make a big difference. For trailered boats, a simple peak pole combined with ratchets reduces pooling. Invest in support to extend cover life.
How to measure, pick the right fit, and install correctly
Getting measurements right is the single most important step before buying a winter boat cover. Record LOA, beam, and height to the highest fixed point, plus overhangs and swim platforms. A correct fit reduces wind flap, prevents pooling, and extends fabric life. Use the steps below and refer to the trailered cover guide for trailer-specific notes.
- Measure LOA from bow to stern including swim platforms.
- Measure beam at the widest hardware, not just hull width.
- Measure height to the highest fixed point such as radar or antenna.
Key fit features to demand are vents, reinforced patches at stress points, access zippers, and long skirts for secure cinching. Keep protective padding where straps contact gelcoat. Installation sequence differs by storage type, but the objective is the same: even tension and proper supports to avoid sag and pooling.
Measuring checklist for hull, beam, cabin, and overhangs
Take three hull length measurements (centerline and both sides), beam at widest hardware, and height to the highest permanent fixture. Record swim platform and bow overhangs. Use these numbers rather than manufacturer nominal lengths when ordering fitted covers.
Fitting features to demand: vents, reinforced patches, zippers, skirts
Vents reduce condensation, reinforced patches protect against rubbing, zippers allow access without removing the entire cover, and long skirts keep wind out. Look for double stitching at seams and quality grommets for secure fastening.
Step‑by‑step installation for trailer, on‑land cradle, and moored boats
Start at the bow, pull cover evenly to the stern, secure stern straps, tension sides with ratchets or cinches, and install support poles to create a peak. For moored boats, leave vent areas unobstructed and secure all attachment points. Use soft pads where straps touch gelcoat.
Fastening systems and windproofing: straps, cinches, ratchets, anchor points
Choose steel ratchets for trailer travel and strong cinches or cam buckles for stationary storage. Anchor points should be reinforced and protect gelcoat. A loose cover flaps and abrades; a correctly tensioned cover stays quiet and secure.
Maintenance, repairs, seasonal care, and longevity tips
Good maintenance extends the life of your winter boat cover and prevents spring surprises. Start with pre-cover prep: wash and dry the hull, remove perishables, treat fuel and batteries, and place moisture control devices inside. Store electronics and cushions indoors when possible. During winter check tension after storms and clear snow quickly.
- Clean and dry before covering
- Use battery maintainers and fuel stabilizer
- Keep vents clear and support poles in place
Repair kits vary by fabric: marine thread and needle for canvas, adhesive patches for polyethylene, replacement grommets for hardware failures. Small tears can be sewn or patched; seam failures often require professional resewing. Never store a wet cover folded — mildew forms quickly and is hard to remove.
Pro tip: Inspect straps, grommets, and vents monthly in winter; catching a loose grommet early prevents a full seam failure.
Pre‑cover prep: cleaning, drain plug, batteries, fuel stabilizer, moisture control
Wash and dry all surfaces, close seacocks, install a trickle charger, add fuel stabilizer, and place desiccant or vented moisture absorbers inside. These steps reduce condensation and corrosion risk.
In‑season checks and snow/ice management
After heavy snow, clear accumulations by hand; never stand on taut fabric. Use a roof rake or soft brush and remove water from low points. Check vents and straps after storms.
Repair guide: patching fabrics, replacing grommets, sewing vs adhesive
Match repair method to fabric: sew canvas with marine thread, use industry patch kits for poly tarps, and replace grommets with reinforced washers. For large seam failures, consult a professional.
End-of-winter inspection and safe cover removal/storage
Remove cover on a dry day, shake out dirt and salt, wash per manufacturer instructions, air dry completely, fold loosely, and store in a breathable bag away from sunlight and pests.
Cost, comparison, and decision-making tools
Cover cost varies widely: basic poly tarps run roughly $50–$200, off‑the‑shelf fitted polyester $150–$400 for small boats, and custom canvas or high-end sewn covers range from $800 to $3,000+ depending on size and complexity. Cost drivers include material grade, reinforced hardware, custom cutting, and whether installation labor is required. Think ROI: a repairable, reusable custom cover can save money over repeated single‑use shrink-wrap seasons.
- Identify storage type and access needs.
- Set a realistic budget including installation labor.
- Match material and style to climate and reuse plans.
Use this quick decision matrix: trailered + budget → reinforced fitted polyester; moored in cold climates → breathable canvas or boom tent with vents; long-term, no-access storage → shrink-wrap with vents and sacrificial support. Always factor in installation labor at a marina vs DIY time when comparing total cost. Avoid buying on price alone — a low-cost cover that fails in one season often costs more in the long run.
Typical price ranges and what drives cost
Materials, custom sizing, reinforced hardware, country of manufacture, and warranty length drive price. Custom sewn goods and marine-grade fabrics demand higher upfront cost but often longer usable life.
DIY shrink‑wrap vs custom sewn covers: pros and cons
Shrink-wrap is cheap and tight but limits access and traps moisture; custom sewn covers fit well, are repairable, and support ventilation. Choose based on access frequency and reuse plans.
Quick decision matrix: match cover type to storage scenario and budget
Trailering: reinforced fitted polyester. Moored sailboat: boom tent or vented canvas. Indoor storage: basic fitted cover works. If unsure, consult specific fit guides or a professional.
Conclusion
A well-chosen winter boat cover protects your boat from snow, freeze/thaw cycles, UV, and pests while preserving resale value and reducing spring maintenance. Start by defining your storage goals, consult measurement guidance, and match material and style to climate and access needs. Prioritize ventilation, proper fit, and support to avoid pooling and mildew. For technical safety guidance and planning, review USCG boating safety and check seasonal forecasts before major storms; for broader marine conditions consult NOAA guidance. Take action now: measure carefully, pick the right material, install supports, and schedule routine winter checks so your winter boat cover becomes a reliable part of your boat care routine.
Frequently Asked Questions
What is the best way to cover a boat for winter?
The best way to cover a boat for winter is to use a well-fitted, breathable cover with proper supports, secure tie-downs, and periodic checks. Start by cleaning and drying the boat, removing electronics and valuables, and adding a light coat of wax to protect the finish. Install internal support poles or a frame to avoid water and snow pooling, and tension the cover with adjustable straps to prevent flapping. Choose a cover that allows ventilation to prevent mold—look for breathable materials or vents. Check fastenings every few weeks and clear heavy snow promptly to protect the hull and hardware.
What is the best material for a winter boat cover?
The best material for a winter boat cover is marine-grade polyester with a waterproof coating because it balances durability, breathability, and weather resistance. Polyester resists stretching and UV damage, while a reliable coating sheds rain and snow; breathable weaves help prevent trapped moisture and mildew. Alternatives include acrylic canvas for long-term storage or PVC shrink-wrap for full-seal protection, though shrink-wrap can trap moisture and is less reusable. When choosing material, consider weight (heavier for exposed locations), seam construction, and strap attachment points to ensure the cover stays secure through winter storms.
Is it okay to leave a boat uncovered in winter?
No, it’s generally not okay to leave a boat uncovered in winter because exposure to weather increases the risk of ice damage, moisture intrusion, and finish deterioration. If you must leave it uncovered briefly, fully winterize the engine, drain waterlines, add antifreeze to systems, remove batteries and electronics, and place a fitted cockpit cover or tarp over sensitive areas. Park with a slight bow-up pitch to shed water and use a bilge pump or plug removal to prevent freeze damage to the bilge and plumbing. Regularly inspect for snow load, rodents, and ice to avoid costly repairs.
Boating Enthusiasts — Join the Crew!
Free Boat Protection Guide Download Yours Now
Get your free copy of The Complete Boat Protection Guide — expert tips, real-world strategies, and exclusive insights from the Safeboatz team.