![]()
Trailerable Boat Cover Guide: Fit, Trailering & Care
Trailerable Boat Cover Guide: Fit, Materials & Practices
Trailerable boat cover choices matter the moment you pull your craft onto a trailer and head for the road. In this guide you’ll find clear steps to measure, choose materials, secure for trailering, and maintain your cover so it lasts. You’ll learn how to match cover type to use case, why breathability beats sealed plastic in many climates, how to avoid common measuring mistakes, and which hardware features you should insist on. If you need measurements before buying, check the measuring checklist and photos in our measuring guide and consult official trailering safety from the U.S. Coast Guard. This introduction previews the sections ahead so you can skip to the step you need now: choosing a material, measuring precisely, securing for highway speeds, repairing small tears, or comparing warranty and return policies.
How to choose the right trailerable boat cover
Choosing the right cover starts with defining how you use the boat. If you haul weekly at highway speeds you need a cover built for abrasion and secure tie-downs. If you store for months in humid conditions you prioritize breathability and venting. Decide between three primary options: universal, semi-custom, and custom. Each has tradeoffs in fit, price, and protection. Below we break down types, materials, and the must-have features so you can match product claims to real world needs.
Cover types: universal, semi-custom, custom, cockpit/t-top, pontoon
Universal covers are low-cost and offer basic protection for short-term use. They fit a range of hulls but rarely secure tightly during high-speed trailering. Semi-custom covers use size bands and shaped panels to better follow hull contours and usually add reinforced tie-downs—good for frequent trailering. Custom covers are cut to your boat’s exact measurements and protect best in storage and trailering, but cost more. For specialized craft choose cockpit or T-top covers that protect consoles and electronics, and dedicated pontoon covers that account for deck overhang and dual pontoon width. Practical tip: if you trailer at >55 mph regularly, lean to semi-custom or custom with reinforced seams and ratchet straps.
Materials and coatings: polyester, nylon, solution-dyed acrylic, PVC, breathable membranes
Material choice influences UV life, abrasion resistance, and moisture behavior. Solution-dyed acrylic offers top UV fade resistance and breathability but is heavier and less waterproof unless coated. Polyester with a PU coating balances light weight and durable waterproofing; choose higher denier for abrasion resistance. PVC tarps are highly waterproof but trap moisture and encourage mildew on stored boats. Breathable membrane composites combine water-shedding outer layers with inner moisture-vapor transmission so condensation escapes. For sun-drenched climates prioritize solution-dyed or high UV-rated polyester; for saltwater trailering pick abrasion-resistant, coated polyester. Always check whether the fabric is rated for trailering vs stationary use.
Key features to prioritize: UV resistance, waterproof vs water-resistant, reinforced seams, wear patches
When you inspect options, watch for reinforced keel and transom patches, heavy-duty tie-down loops, and rust-proof hardware. UV resistance prevents brittle fabric and fading; ask for UV life estimates or look for solution-dyed claims. Understand that waterproof can mean non-breathable: waterproof coatings stop liquid but often trap water vapor. For long storage, water-resistant breathable systems are better because they reduce mold risk. Reinforced seams and bar-tacked tie points are essential when you plan to trailer frequently—weak seams fail first. Add keel protectors and rub-rail guards where straps contact the hull.
- Checklist: intended use, climate, transport speed, boat type.
- Decision flow: frequent trailering → abrasion + strap strength; storage → breathability + vents.
- Pro tip: choose solution-dyed fabrics for UV longevity and add keel protectors under straps.
Measuring your boat for a trailerable cover (step-by-step)
Accurate measurements are the most common difference between a cover that protects and one that fails. Measure the boat while it’s level on the trailer, with accessories in the positions you intend to transport. Write measurements on a checklist and take photos of bow, stern, port, and starboard; these help sellers confirm fit, especially for semi-custom or custom orders. Avoid measuring hull length only—include beam and highest point, and note accessories that add height or width. Use the photos and measurements when you order and keep them if you need a replacement or warranty claim.
Essential measurements: length (centerline), beam (max width), height (highest point)
Measure the centerline length from bow tip to transom, recording whether you include swim platforms but excluding a tilted-up outboard unless you transport it tilted. Measure beam at the widest exterior point, including rails, rub rails, and any fixed accessories. Measure height at the tallest permanent element—windshields, consoles, towers—while on the trailer in towing position. Record decimals or fractions and note if measurements are to the top of a tower or to the folded tower top. When ordering universal covers add tolerance allowances: universal sizes often require 6–12 inches extra in length and width.
Measuring for outboards, towers, consoles and accessories
Special cases need notes. For outboards that fold up, measure with the motor in the towing position. For towers or wakeboard racks that fold, note both folded and deployed heights and state that you will transport with them folded. For consoles with windshields, measure to the top of the highest fixed glass. If you have removable accessories like baitwells or towers, indicate whether you will remove them before trailering. Include pictures of brackets and tilt angles so the seller can confirm whether to include protective pockets or extra height allowance.
How to convert measurements into size choices for universal and semi-custom covers
Universal covers use broad size bands; order the next size up if you’re between bands and plan to add support bows. Semi-custom orders often require centerline length, maximum beam, and height; confirm whether the manufacturer needs swim platform inclusion. Typical tolerance guidance: universal = +6–12 inches length, +4–8 inches beam; semi-custom = +2–4 inches. Bring your measurement sheet or upload the photos to the seller and ask for a sizing confirmation. If you’re debating between a snug semi-custom and a roomy universal, choose snug for trailering and roomy for long-term storage.
- Place boat level on trailer and lock brakes.
- Measure centerline length, beam, and height, and take four photos.
- Record accessories and note whether they’re removed for travel.
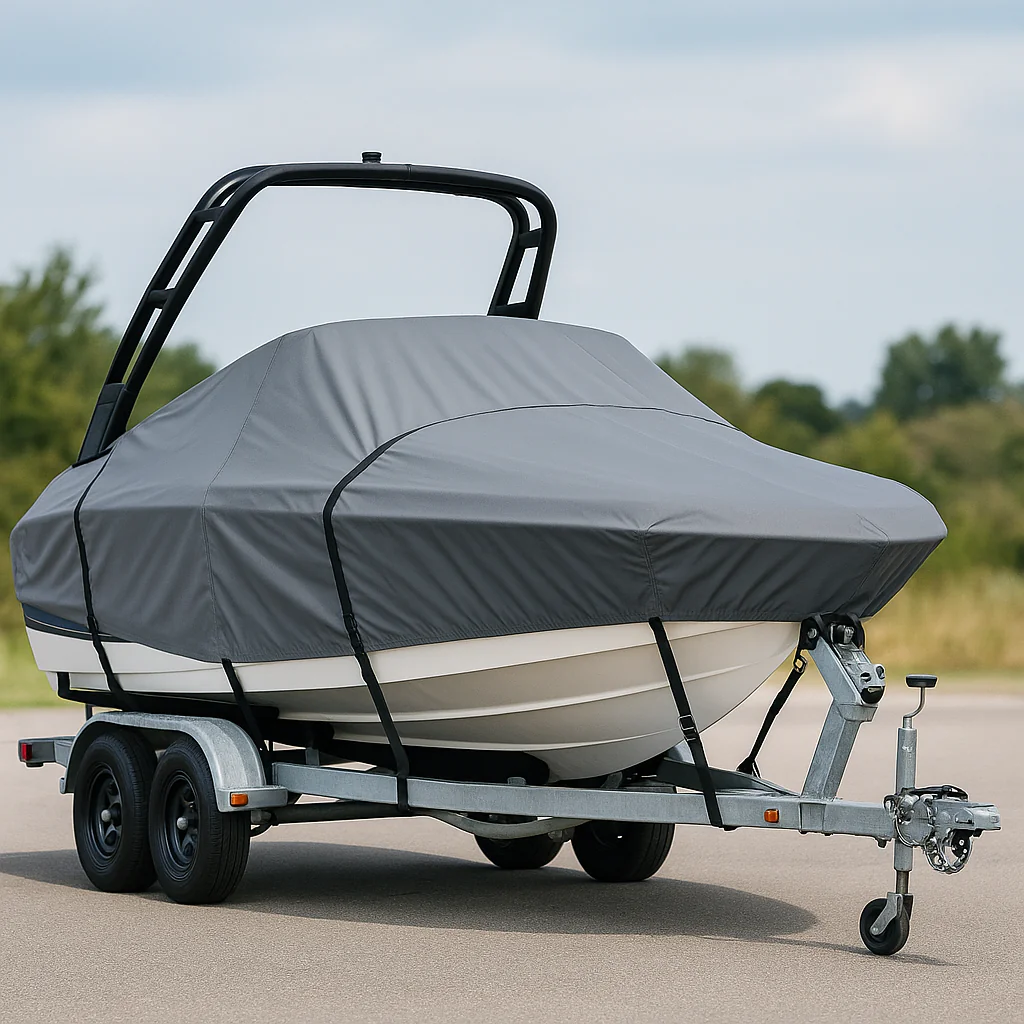
Installation and securing for trailering
Proper installation prevents flapping, seam failure, and water pooling. Start by centering the cover on the hull and locating built-in centerlines if present. Secure bow and stern first, then mid-ship, then finish with secondary safety lines. Use hardware rated for road use: cam-buckles or ratchet straps designed for vibration and exposure. Add chafe protection where straps meet fabric and avoid high-stress knots. Check lights and visibility before you go: a cover must not block license plates, running lights, or reflectors.
Correct fit check: tension, wrinkle elimination, drainage
After you fit the cover, run a visual check: the fabric should be evenly tensioned with no deep wrinkles that can trap water. Create slopes for drainage by using support bows or poles in cockpit areas to prevent pooling. Confirm that vents are aligned with breeze paths to keep airflow moving. A proper fit will have bow and stern tied down and midship tension distributed, reducing any flapping that leads to abrasion. If you hear flapping at speed, stop and re-tension before continuing the trip.
Strapping, buckles, and anchor points: best practices for road use
Use straps rated for road use and anchored to trailer cleats or D-rings—not to weak fabric loops alone. Route straps so they do not rub against trailer edges or the hull; use soft loop protectors where straps contact fabric. Avoid over-tightening which concentrates load on seams; tighten until snug and test with a short drive. Secondary safety lines crossing under the hull catch the cover if a primary buckle fails. Keep spares of buckles and webbing in your repair kit.
Wind resistance, vents, and trailer airflow — preventing flapping and damage
Design for airflow: vents reduce pressure differentials that cause lift and flapping. Provide vents where air can move from bow to stern and ensure vents are not blocked by accessories. Support bows, reflective strips, and secure ratchets reduce flutter. In high-wind transitions, add extra safety lines and lower your trailer speed. Test at low speed first and re-check every 20–30 miles on long trips.
Legal & safety considerations when trailering with a cover (visibility, lights, DOT tips)
Before you drive, confirm that your cover doesn’t obscure tail lights, license plates, or required reflectors. In many jurisdictions you must ensure visibility of lighting; use reflective strips or cutouts if needed. Check local DOT guidance and align with the safety recommendations of the National Weather Service for wind advisories that affect trailering. Carry documentation of secure tie-downs and use reflective markers for night towing.
- Fit cover and secure bow/stern first.
- Tension midship, add secondary safety lines, then test at low speed.
Care, repair, and seasonal storage for trailerable covers
Maintenance extends service life and prevents costly interior damage. Clean covers after saltwater exposure or heavy storms and always dry thoroughly before folding. Keep a repair kit with patches, seam sealer, and replacement buckles handy. For seasonal storage choose breathable storage bags and avoid compressed piles that crush coatings. Inspect straps and seams annually and replace worn parts before a long haul or winter season.
Cleaning, drying, and mildew prevention for stored covers
Cleaning steps: rinse salt and debris with fresh water, wash with mild soap and a soft brush, rinse thoroughly, and air dry fully before folding. Never use bleach or strong detergents that strip coatings. For mildew treatment use a marine-safe mildew cleaner and let the fabric dry in sun. Store in a cool, dry place and avoid plastic bags that trap humidity—use breathable bags or cotton storage sacks to keep vapor moving.
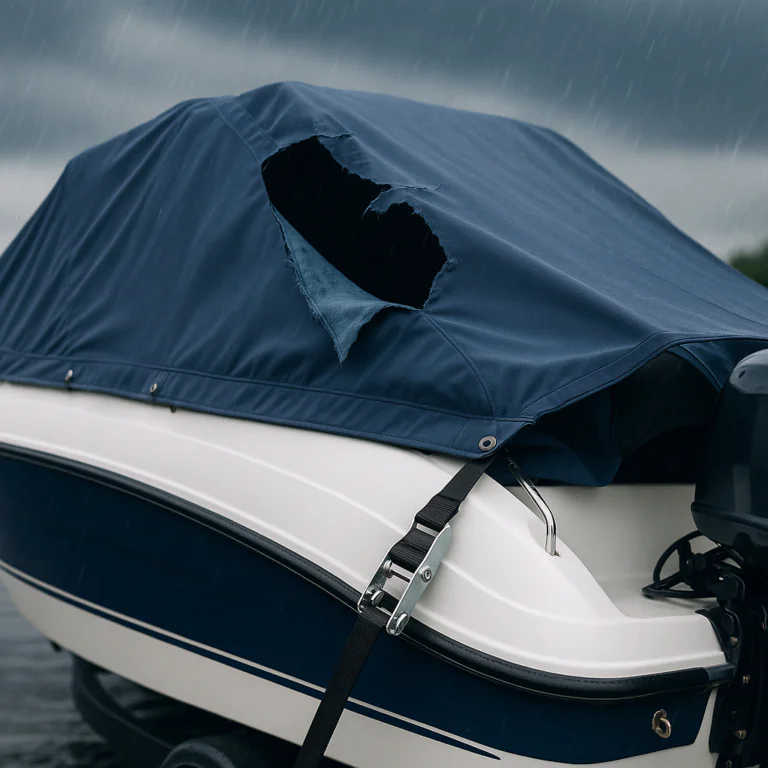
Quick repairs: patching tears, seam repair, zippers and snaps
For small tears use adhesive-backed fabric patches as a stopgap, then apply a sewn patch or professional repair for load-bearing areas. Use seam sealer on leaking stitched seams and replace zippers or snaps if corroded. Keep spare buckles and short lengths of webbing so you can jury-rig a secure strap in the field. For any structural seam failure, resew with heavy polyester thread and seal the stitch line.
Long-term storage: folding, breathable storage bags, avoiding compression damage
Fold loosely to avoid creasing coatings and store in a breathable bag away from direct sunlight. Don’t stack heavy items on top of a packed cover; compression damages membranes and coatings. Label the bag with the boat model and measurements so you can quickly find the right cover next season. Inspect once during storage to ensure no rodents or pests have nested in the bag.
- Cleaning checklist: mild soap, brush, rinse, full air-dry.
- Repair kit: fabric patches, seam sealer, spare buckles, heavy thread.
Buying guide & comparisons (value, warranties, and real-world choices)
When shopping, balance price, materials, reinforcement, and warranty. Low-cost tarps protect against sun and light rain but wear quickly. Mid-range semi-custom covers offer better fit, thicker fabric, and stocked replacement hardware. High-end custom covers cost more but minimize water pooling and flap damage and typically include longer warranties. Ask sellers if a cover is rated for highway trailering and whether they offer measurement verification or resizing options on return.
Custom vs semi-custom vs universal — when each is right
Choose universal for quick, budget protection or for seasonal short-term use. Semi-custom is the sweet spot for owners who trailer often but want value; it offers reinforced tie points and improved shape. Custom is right when you need an exact fit for sensitive gear, long-term storage, or high-speed trailering. If you plan to tow at highway speeds more than a few times a season, invest in at least a semi-custom solution with reinforced seams and ratchets.
Price vs durability matrix: cheap tarp vs heavy-duty cover vs custom fabrication
Price tiers correlate with expected lifespan and protection. Low-cost tarps may run one or two seasons. Mid-range semi-custom covers typically last 3–7 seasons with regular care. High-end custom covers can exceed seven seasons if maintained. Compare material denier, coating type, and hardware quality rather than sticker price alone. Document your purchase and capture photos if you expect to file a warranty claim.
Warranty, return policies, and measuring/return tips
Read warranty terms carefully: some warranties exclude trailering or improper measurements. Ask whether the seller will inspect measurements before cutting and if there’s a sizing guarantee. Keep purchase receipts and photos; document any defects promptly. For more details on typical warranty coverage and activation steps, review the manufacturer’s warranty page such as the one at warranty details.
Quick shopping checklist and recommended questions to ask sellers
Bring your measurement sheet and photos. Ask these questions: Is the cover rated for trailering at highway speeds? What vents are included? Are replacement parts stocked? What is the return or resizing policy? Confirm shipping times and ask whether the cover includes reinforced keel, transom, and strap points. If in doubt, choose a seller who verifies measurements before finalizing the order. For product-specific options see the 17–19ft and 20–22ft models that illustrate features to expect: 17–19ft and 20–22ft.
Expert takeaway: prioritize fit and hardware over lowest price; a well-secured cover prevents most trailering failures.
- Comparison checklist: material, weight, reinforcement, straps, warranty.
- Questions list: trailering rating, ventilation, replacement parts.
Conclusion
Measure carefully, choose material for your climate and use case, secure the cover properly for trailering, and maintain it to extend life. Before you buy, photograph accessories, record centerline length, beam, and height, and confirm sizing with the seller. When in doubt spend more on fit and hardware than short-term savings; the few extra dollars for reinforced seams and ratchets often prevent costly repairs. For weather and trailering decisions check the NOAA and the National Weather Service for alerts that affect towing and storage. Final printable checklist: Measure → Choose type/material → Install/secure → Maintain → Inspect annually. Top mistakes to avoid: wrong measurements, insufficient tie-downs, and storing the cover wet. Keep a small repair kit in the truck and inspect straps before every trip so you travel with confidence.
Quick pre-launch checklist: check tension, lights, reflectors, and secondary safety lines before every highway run.
Frequently Asked Questions
Can you trailer a boat with the cover on?
Yes, you can trailer a boat with the cover on if the cover is specifically designed for trailering and is properly secured. Start by making sure the cover fits well and has reinforced attachment points, then use appropriate straps and tie-downs to prevent flapping. Add support poles to avoid water pooling and ensure vents or breathable panels are present to reduce moisture buildup. Check that the cover does not block lights, registration, or safety chains, and inspect all fastenings before you drive. For safety, use chafe protection where straps contact the hull and reduce speed in strong crosswinds.
Are Seal Skin boat covers trailerable?
Some Seal Skin boat covers are trailerable, but you should confirm the specific model’s trailering suitability before use. Look for a manufacturer’s note or label that indicates the cover is rated for trailering, reinforced hems, and extra tie-down points; those features make a cover safer at highway speeds. If the product instructions aren’t clear, contact the maker or your dealer and ask about recommended speed limits and installation methods. Use additional straps, support rods, and chafe guards when trailering, and inspect the cover for wear after each trip to ensure long-term reliability.
Do they make covers for boat trailers?
Yes, there are covers made specifically for boat trailers to protect components from weather, salt, and UV exposure. You can find full trailer covers, wheel and hub covers, winch-end covers, and hitch protectors made from durable, often UV-resistant or water-repellent fabrics. When choosing one, prioritize correct sizing and secure attachment points so the cover won’t flap or shift in transit. These covers help preserve brakes, bearings, and metal parts during storage or transport; just remember to remove or adjust covers for inspection and maintenance so you don’t trap moisture or hide mechanical issues.
Boating Enthusiasts — Join the Crew!
Free Boat Protection Guide Download Yours Now
Get your free copy of The Complete Boat Protection Guide — expert tips, real-world strategies, and exclusive insights from the Safeboatz team.