![]()
18 ft Boat Cover Waterproof Heavy Duty: Buyer’s Guide
18 ft Boat Cover Waterproof Heavy Duty: Buyer’s Guide
18 ft boat cover waterproof heavy duty is the protection you need when you trail, store, or leave your boat exposed to the elements. In this guide you’ll learn why a true heavy duty waterproof cover matters, how to measure and choose materials, how to install and secure the cover for trailering, and how to maintain it so it lasts. If you want practical, hands-on advice start with our measuring guide and check official safety recommendations from the U.S. Coast Guard before long trips. This article covers threats, fabric choices, fit considerations, installation steps, maintenance, buying checklists, and accessories so you can make a confident choice.
Why choose a waterproof heavy duty 18 ft boat cover
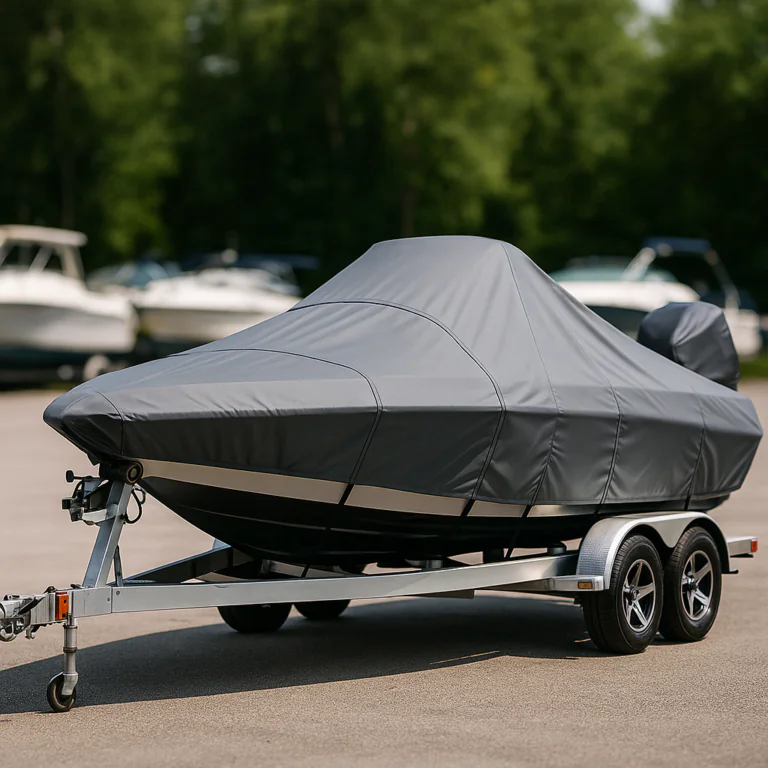
Choosing an 18 ft boat cover waterproof heavy duty reduces risk and keeps your boat ready to use. The main threats are obvious: driving rain and pooling water, relentless UV degradation, abrasion while trailering, and mildew from trapped moisture. A cover labeled heavy duty should include measurable attributes like denier rating, a protective coating such as PU or PVC, and taped or welded seams. For trailering you need low-stretch fabric and reinforced tie points; for long-term slip storage you want breathability and UV resistance as priorities.
- Main threats: rain ingress, UV, abrasion, mildew.
- Measurable attributes: denier ≥600D, coated fabric, taped seams.
- Use cases: trailering vs long-term storage.
Quick decision flow makes choice simple. If you trailer weekly, pick a reinforced, low-stretch, waterproof cover with multiple tie-downs and abrasion patches. If you store under a dock canopy, prioritize breathable, UV-resistant fabric that sheds water without trapping condensate. Common mistakes are clear: buying a cover that repels surface water but lacks taped seams, choosing heavy non-vented fabric that breeds mildew, or trusting a generic “fits 17–19 ft” size without measuring beam and motor clearance. For deeper reading on heavy-duty design traits, see our heavy-duty guide.
Risks of using the wrong cover (water, UV, mildew, abrasion)
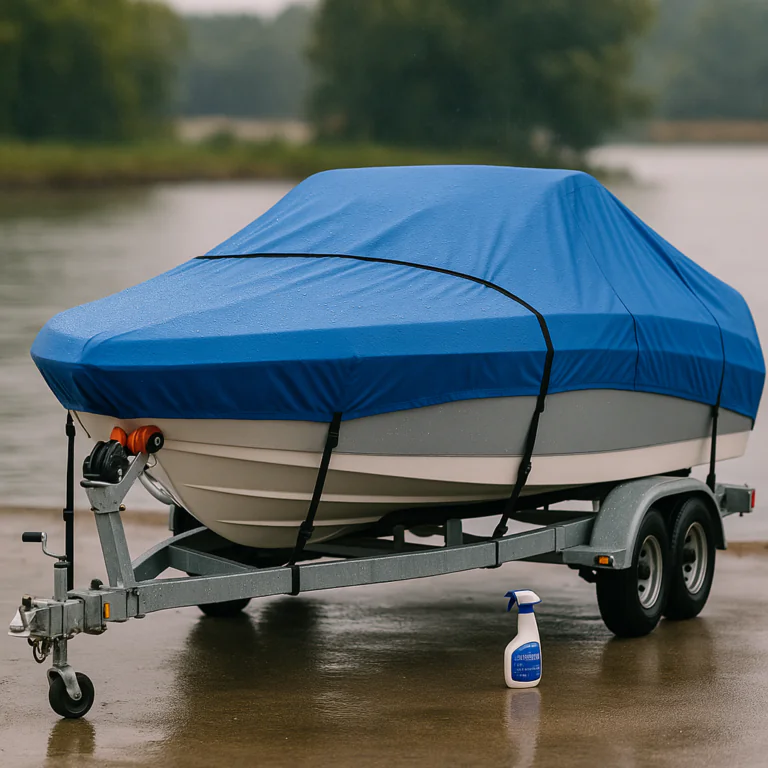
Wrong covers create hidden damage fast. A cover without taped seams allows water to enter at stitching points. A heavy fabric without vents traps condensation and spawns mold. Elastic hems that slip and flapping edges cause abrasion and gelcoat wear. Trailer abrasion is especially damaging: sand, road salt, and vibration can wear through fabric in months if the cover lacks reinforcement. Common fixes—like duct tape—fail quickly under sun and wet conditions. Instead, choose a cover that balances waterproofing and ventilation to prevent both leaks and mildew.
When heavy duty waterproof matters: trailerable vs long-term storage
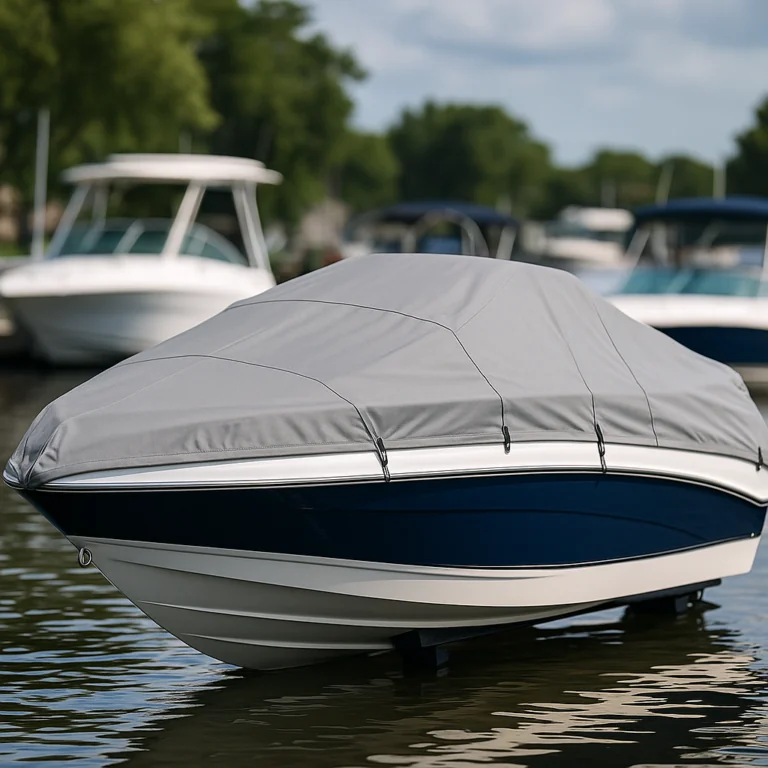
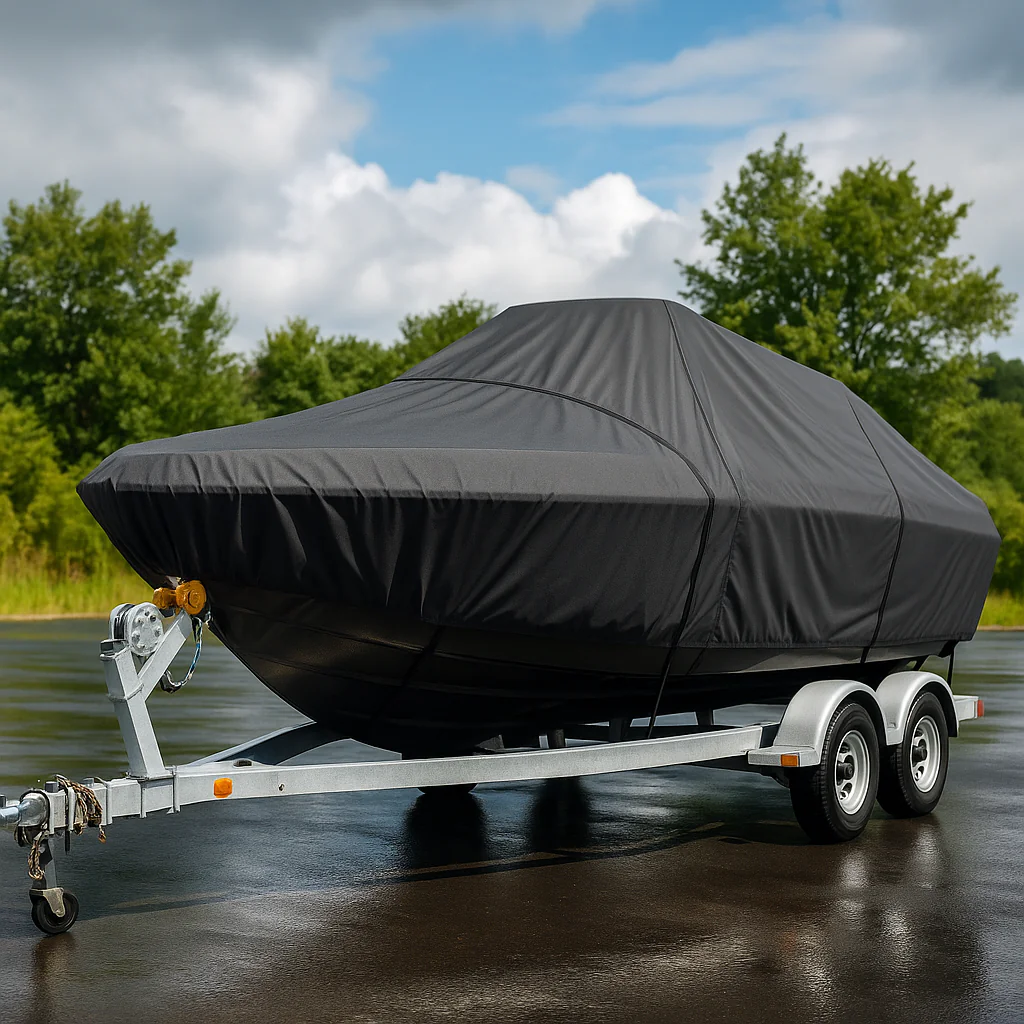
Trailering exposes covers to high wind and road spray. A waterproof heavy duty cover for trailering should have ratchets, reinforced grommets, and anti-chafe patches where the trailer contacts the fabric. For long-term storage, especially in a wet slip, you want breathable panels and vents so condensation does not accumulate. Match the cover to the use: trailering needs low-stretch waterproofing; storage needs breathability and UV defense. If you’re undecided, choose a model designed for trailerable use and that also includes ventilation options.
Performance metrics to look for (denier, PU coating, waterproof rating)
Look for clear specs. Denier gives a sense of thread thickness: 600D is a baseline heavy duty, 900–1200D is tougher for severe trailering. The coating matters: PU coatings preserve breathability better than heavy PVC membranes, which are fully waterproof but can trap moisture. Check seam construction—taped or welded seams beat stitched-only seams. Also verify UV treatment and abrasion reinforcements. As a rule: denier ≥600D, taped seams, and marine-grade coating are minimums for a truly heavy duty waterproof cover.
- Denier: 600D minimum, 900–1200D for heavy abrasion.
- Coating: PU for balanced breathability, PVC for total waterproofing.
- Seams: taped or welded preferred.
How to pick the right fit and material for an 18 ft boat
Getting fit and material right prevents most problems. Measure length from bow to transom, beam at the widest point, and height including windshield and motor. Include accessory allowances for rails, towers, and fish finders. Use those numbers to choose a cover that allows 6–12 inches of extra length for trailerable use and fits the beam with secure elastic hems or ratchets. Material choice depends on use: heavy trailering needs 900D or 1200D polyester with a PU coating; light-duty covers use 210D Oxford; canvas blends offer breathability for storage but will not stand up to frequent trailering.
- Measure LOA, beam, height, and accessories.
- Add length allowance for trailer travel and motor tilt.
- Pick fabric based on use-case: trailering, sun-exposed, wet-slip, or winter snow.
Fabric pros/cons are straightforward. 1200D polyester is highly abrasion-resistant and lasts longer under trailering stress. 210D Oxford is lighter and cheaper but wears earlier. Canvas breathes and resists UV but is heavier and can rot if left damp. PVC is impermeable but can trap moisture and is heavier to handle. Always verify seam taping versus stitched-only seams. Fit allowances matter too: a boat with a high outboard or a bow pulpit must have extra stern or bow slack and motor cutouts or tilt allowances. For trailerable configurations see specific trailerable options and sizing tips.
How to measure your boat: length, beam, motor and accessory allowances
Measure accurately. Measure length on a flat surface from the bow tip to the transom edge. Measure beam at the widest point with any covers, rails, or rub rails in their installed positions. Measure motor height with the motor tilted to the transport position if trailering. Note accessories like towers, antennas, or livewell lids that add height. Record everything on a single sheet before you shop. A common mistake is assuming the published “fits 17–19 ft” covers account for beam or motor height—many do not.
Fabric comparison: 1200D/600D polyester, 210D Oxford, canvas blends, PVC
Material choice is a balancing act. 1200D wins for abrasion resistance and trailering life. 600D is a solid middle ground for many owners. 210D Oxford fits budget needs but has shorter lifespan. Canvas blends breathe but need care. PVC is fully waterproof but heavy. Choose the fabric that matches your routine. If you tow often, prioritize abrasion and coated denier. If you store in a covered slip, prioritize breathability and UV guard.
Construction features: seams, stitching, reinforcements, vents, straps
Examine construction carefully. Taped seams prevent leaks at stitching. Reinforced grommets, abrasion patches at trailer contact points, and strong ratchets or cam buckles make trailering safe. Vents placed at high points reduce condensation. Look for anti-chafe sleeves and elastic hems that hold without cutting into the hull finish. These small design choices make a big difference in service life.
Hull-type fit considerations: V-hull, bass boat, runabout, pontoon (adaptations)
Different hulls need different patterns. Bass boats often need stern and bow support and motor cutouts. V-hulls require snug centerline fit and keel straps. Pontoon covers need specific supports and more vertical fabric to drape over posts. Review product fit notes and photos, and when in doubt choose a custom or semi-custom pattern designed for your hull type.
Installation, straps, ventilation and trailer use best practices
Installation that follows a simple sequence reduces wind damage and fabric wear. Lay the cover over the bow first, center it, pull aft, then secure bow, midships, and stern in that order. Use recommended strap layouts and avoid over-tightening. Add vents and drip rings where needed. For trailering, include a keel strap and anti-chafe pads at bunks. These steps make travel safer and prevent common failures.
- Center cover at bow and pull aft in calm conditions.
- Secure bow, then cinch stern and midship straps sequentially.
- Tension straps to remove slack but avoid overtightening.
Recommended strap patterns include bow and transom straps plus two midship straps running under the hull or across reinforced grommets. Use cam buckles or ratchets placed so they never rub the gelcoat. Ventilation needs intake and exhaust vents at high points; for enclosed covers add 1–2 vents to reduce condensation. Common mistakes include securing only bow and stern (allowing midship flapping), over-tightening, and omitting vents in humid areas.
- Strap tips: add anti-abrasion sleeves and avoid direct hull contact.
- Vent placement: place vents at the highest and lowest practical points to encourage airflow.
- Trailer prep: check trailer hooks and pad contact points before installing.
Pro tip: a center keel strap and properly placed anti-chafe patches reduce lift and fabric wear dramatically on long trips.
Proper installation step-by-step for trailerable covers
Follow these steps: 1) Position cover on bow and align centerline. 2) Pull cover aft over console and seats. 3) Attach bow straps and ratchets loosely. 4) Secure midship straps and tighten evenly. 5) Finish with stern straps and a keel strap. Check clearances and re-tension after a short drive. Keep spare straps and a quick-release kit handy.
Recommended strap/tie-down patterns and anchor points
Use bow, two midship, and stern straps plus a center keel strap. Anchor to trailer hooks or reinforced grommets. Avoid routing straps where they rub bunks or hull paint. Consider quick-release buckles for daily use and ratchets for long hauls.
Ventilation, mold prevention and drainage solutions
Install vents at forward and aft high points. Use breathable fabric panels where possible. Add support poles to prevent pooling and drip rings at the bow to direct runoff. For humid climates, increase vents or use desiccant packs to reduce interior moisture during storage.
Maintenance, repair, and winter storage for longevity
Routine care extends life. Rinse after saltwater exposure, deep clean seasonally with mild soap, and air dry fully before folding. Inspect seams quarterly and reseal or patch problems early. Replace straps every 3–5 years or sooner if sun-damaged. For winter storage, use support poles to prevent pooling and confirm snow-load capacity. Store a clean, dry cover in a breathable bag off the floor.
- Maintenance: rinse, soap, rinse, dry.
- Repairs: patch tears promptly, reseal seams annually.
- Storage: dry, bag, shelf storage recommended.
A quick repair kit should include UV-resistant patches, seam sealer, spare cam buckles, and a strap. Patching follows a simple routine: clean, adhesive patch or sew, apply seam sealer, and let cure fully. Never fold a damp cover into a bag—mold and odor follow.
Cleaning, drying, and seaming maintenance schedule
Rinse after every salt outing. Deep clean monthly during heavy use or seasonally otherwise. Inspect and reseal seams annually, or after storms. Keep a simple log of cleaning and repairs to know when to replace the cover.
Quick repairs: patching tears, resealing seams, replacing straps
Patch tears promptly with manufacturer-recommended kits. For stitched tears, a sewn patch plus seam sealer works well. Replace straps with marine-grade replacements when webbing shows UV degradation or fraying.
Storage tips off-season and while trailering
Off-season: clean and dry fully, store on a shelf in a breathable bag. While trailering: carry a small repair kit and check straps pre-trip. If snow is expected, add support poles to prevent pooling.
Buying checklist, comparison matrix and cost-to-value evaluation
Before you buy, use a one-page checklist: verify length, beam fit, denier, seam type, vents, included straps, weight, and warranty. Calculate price-per-year by dividing price by expected lifespan. A $200 cover lasting five years costs $40/yr; a $400 cover lasting ten years costs $40/yr—value can favor higher upfront investment when durability increases lifespan.
- Confirm measurements and fit allowances.
- Check material specs and seam construction.
- Compare warranties and return policies.
Watch reviews for consistent complaints about seams or fit. Consider local shops for fitting help if custom fit matters. If budget is limited, prioritize taped seams, adequate denier, and vents rather than the cheapest fabric. Practical matrices compare 210D, 600D, and 1200D across price, expected years, and trailering suitability—choose the best mix for your routine.
One-page buying checklist for an 18 ft heavy duty waterproof cover
Make a printable checklist: LOA, beam, motor height, denier, seam type, vents, straps, reinforcement points, included hardware, weight, and warranty length. Tick each box before checkout.
Cost vs lifespan: how to evaluate price per year of protection
Divide cost by estimated lifespan. Account for maintenance and likely replacement cycles. A well-made heavy duty waterproof cover often saves money over time by preventing costly interior and gelcoat repairs.
Warranty, returns, and seller considerations (fit guarantee, trial period)
Check fit guarantees, return windows, and warranty details. Shipping bulky items back is costly—confirm the seller’s policy and read multiple user reviews for recurring issues.
Recommended extras and accessories to extend cover life
Accessories extend life and add convenience. Vents, drip rings, support poles, anti-chafe patches, strap protectors, and lockable straps are high-value additions. Use drip rings to direct runoff, support poles to avoid pooling, and anti-chafe patches where bunks touch the fabric.
- Accessories: vents, support poles, drip rings, anti-chafe patches.
- Security: lockable straps and strap sleeves.
- Replacement schedule: straps 3–5 years, seam reseal annually.
Vents, drip rings, bow and stern support poles
Install vents at high points. Fit drip rings at the bow to keep water off the hull. Support poles placed under the cover prevent pooling and reduce stress on seams. Always pad contact points to avoid chafing.
Anti-chafe reinforcements, strap protectors and lockable straps
Anti-chafe patches at trailer bunks and stern corners save fabric life. Strap protectors stop webbing from cutting into the cover. Lockable straps deter theft and keep the cover secure on long trips.
Conclusion
Choosing the right 18 ft boat cover waterproof heavy duty comes down to matching material, fit, and construction to how you use the boat. Measure carefully, prefer taped seams and adequate denier, and select ventilation and strap systems that match trailering or storage needs. Keep the cover clean, dry, and patched, and add accessories like vents and support poles to extend life. For more on ventilation and mold prevention consult our ventilation guide and check local marine weather resources such as NOAA forecasts and the National Weather Service when planning storage or trailering in severe conditions.
Frequently Asked Questions
What is the best waterproof material for boat cover?
The best waterproof material for a boat cover is usually a multi-layer fabric such as coated polyester or marine-grade PVC because it offers a strong balance of water resistance and durability. You should look for a fabric with a reliable coating (for example, polyurethane or PVC) and taped or welded seams to prevent leaks. In practical terms, choose coated polyester if you want breathability and lighter weight for regular use, and choose marine-grade PVC for long-term exposure, heavy rain, or abrasive environments. Also check for reinforced stress points, UV resistance, and good fit to keep water from pooling and reduce wear over time.
What is the difference between 600D and 1200D boat cover?
The difference between 600D and 1200D boat covers is mainly fabric weight and toughness: denier measures fiber thickness, so 1200D is thicker and more abrasion-resistant than 600D. For you, that means a 1200D cover will resist punctures, tears, and prolonged UV exposure better, while a 600D cover is lighter, easier to handle, and usually less expensive. Choose 600D for seasonal or sheltered storage and easier installation; choose 1200D for year-round outdoor storage, rough conditions, or heavy use. Also compare coatings, seam construction, and hardware, because those affect real-world performance more than denier alone.
What is the best thickness for a boat cover?
The best thickness for a boat cover depends on storage conditions: aim for a medium to heavy thickness—roughly 12–18 oz fabrics or 600–1200D equivalents—for most outdoor situations. You’ll want heavier, thicker materials if your boat is stored outside, near saltwater, or exposed to high winds because they resist tearing and abrasion. For indoor or occasional use, lighter covers save weight and make handling easier. Also consider how thickness is measured—vinyl is often rated in mils while fabrics use ounces or denier—and pair thickness with good fit, ventilation, and secured tie-downs to prevent water pooling and extend the cover’s life.
Boating Enthusiasts — Join the Crew!
Free Boat Protection Guide Download Yours Now
Get your free copy of The Complete Boat Protection Guide — expert tips, real-world strategies, and exclusive insights from the Safeboatz team.