![]()
Waterproof Boat Cover Guide – Buy Fit and Care 2026
Waterproof Boat Cover: Buy, Fit & Care Guide (2026)
waterproof boat cover should be the first protective item you buy for any vessel kept outdoors, trailered, or stored for months at a time. This guide walks you through fabrics, measuring, installation, care, and buying decisions so you avoid common mistakes and protect your investment. You’ll find step-by-step instructions, practical checklists, and links to official guidance including the measuring guide and U.S. Coast Guard guidance for trailering and mooring rules.
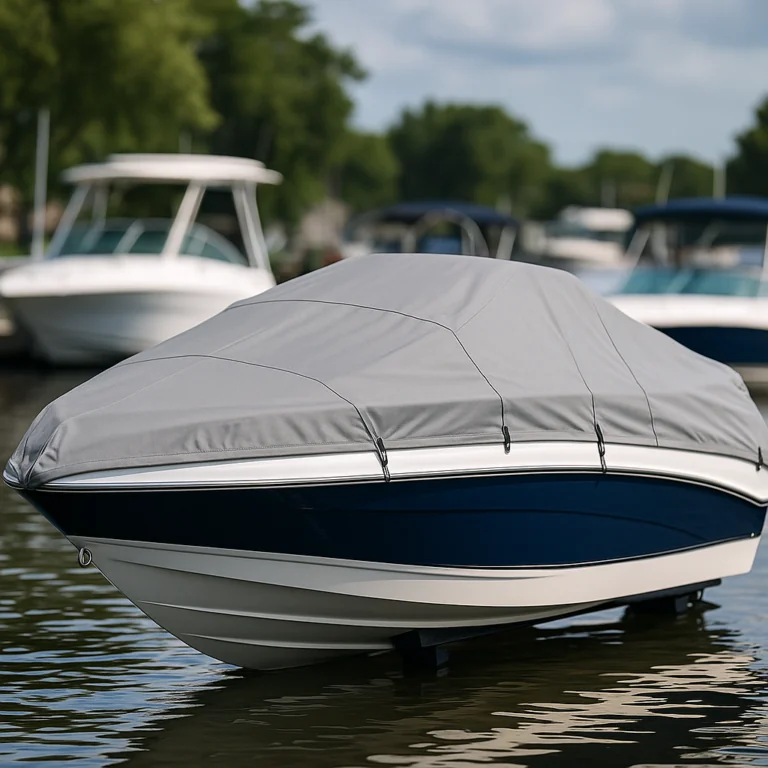
Types & Materials of Waterproof Boat Covers
Common fabrics (polyester, marine-grade polyethylene, PVC, solution-dyed acrylic)
Choosing a cover starts with material. Typical options include marine-grade polyester with PU coating, heavy-duty polyethylene tarps, PVC-coated fabrics, and solution-dyed acrylic. Each has a role: marine-grade polyester balances weight and UV resistance, polyethylene tarps are fully waterproof and economical, PVC coatings offer abrasion resistance, and solution-dyed acrylic provides breathable UV protection. Look for denier ratings and proper coatings: a 600–900D polyester with a PU layer lasts longer than cheap low-denier tarps. Consider lifespan: solution-dyed acrylic often offers the best colorfast UV life, while heavy PE may last 3–6 years in high-sun areas. For technical specs pay attention to denier, PU coating, and UV inhibitors when comparing labels. For deeper reading about premium fabrics see our 900D fabric article.
Waterproof vs water-resistant vs breathable covers
Not all covers labeled “waterproof” perform the same. Waterproof implies no water passage, usually via a coating and seam treatment. Water-resistant repels light rain but can wick under pressure or long exposure. Breathable covers let trapped moisture escape, reducing mold risk. Choose based on storage method: for short-term dock use a breathable fabric with vents works well; for trailering through rain you want fully waterproof seams. Beware: a fully waterproof, non-breathable cover can trap condensation during long enclosed storage and cause mildew.
Coatings, seam construction and seam-sealing methods
Seams are frequent failure points. Methods include heat-welding, taped seams, and stitched seams treated with seam sealer. Heat-welded or taped seams provide the best leak resistance on coated fabrics, while stitched seams need reliable seam sealer applied. Inspect where panels meet—overstressed seams near cambers and grommets are common failure spots. Durable covers combine a robust fabric with reinforced seams and double-stitched edges where hardware mounts.
- Materials checklist: UV resistance, mildew resistance, waterproof rating, weight/denier, warranty.
Pros/cons by boat type (pontoon, center console, bass boat, cabin cruiser)
Boat type affects ideal material. Pontoons benefit from heavy polyester with taped seams and support frames to avoid sagging. Center consoles often need covers that clear towers and vents—choose a semi-custom or custom-fit breathable option. Bass boats demand snug, aerodynamic covers for trailering; a heavy-duty polyester with ratchet tensioning reduces flapping. Cabin cruisers kept in long-term storage should favor breathable solution-dyed acrylic with vents to prevent condensation. Example scenarios: 1) For uncovered trailer storage in sun choose heavy-duty polyester with UV coating and taped seams. 2) For short-term dock use prefer solution-dyed acrylic with vents. 3) For heavy trailering pick reinforced polyester with ratchets and reinforced tie-points.
- Quick reference: material → best use → lifespan estimate → cost bracket.
How to Measure & Choose the Right Fit
Measuring steps for trailer and moored boats (step-by-step)
Accurate sizing is the most common make-or-break step. Measure length from bow tip to transom, beam at the widest point, height to the highest fixed point, and note trailer attachments or swim platforms. Record where the freeboard sits and photograph the boat from multiple angles for custom orders. Use a measuring tape and a helper if possible. Follow this ordered process:
- Measure overall length and add swim platform or bow pulpit if present.
- Measure the maximum beam across rails or rub rails.
- Measure vertical height to the highest point with accessories in both up and down positions.
Pro tips: measure towers both up and down, note removable accessories, and never rely solely on LOA without accounting for extras. Common mistakes include using LOA only and buying a size that « looks close »—this leads to rubbing and premature wear.
Universal covers vs custom-fit vs semi-custom options
Universal covers are affordable and fast to obtain but often fit loosely. Custom-fit covers offer the best protection and look but cost more and have lead times. Semi-custom options balance cost and fit with adjustable panels. Choose based on use: if you trailer frequently or store long-term, invest in semi-custom or custom. For casual, seasonal use a universal cover with reinforced tie points may suffice. When ordering custom, provide photos and measurements from the measuring guide to reduce sizing errors.
Key fit features: tensioning, straps, buckles, support poles, vents
Good fit includes a snug transom area, adequate tie-down points, vents in the right places, and tensioning hardware like ratchets or drawcords. Support poles or cross rods prevent water pooling and extend fabric life. Check that buckles are corrosion-resistant and that straps route away from sharp edges. Always allow overlap for runoff so water sheds rather than pools near seams.
- Fit checklist: snug at transom, tie-downs, vent placement, overlap for runoff.
Installation, Securing & Trailering Best Practices
Step-by-step install for storage, mooring and trailering
Installation begins with inspection: check for tears, confirm straps and grommets. Center the cover, secure bow and stern first, then tighten side straps, and finish with transom tie-downs. For trailering, use highway-rated straps and follow a tightened sequence to keep the cover aerodynamic. Here’s a reliable sequence:
- Lay cover centered over hull and align seams with rub rails.
- Secure bow and stern, then work side straps sequentially to remove slack.
- Add support poles where water would pool and finalize transom tie-downs.
Safety notes: avoid routing straps over electronics and use chafe guards where straps pass over metal. For detailed tensioning hardware advice see our ratchet guide. Always test short drives at low speed to verify security before highway travel.
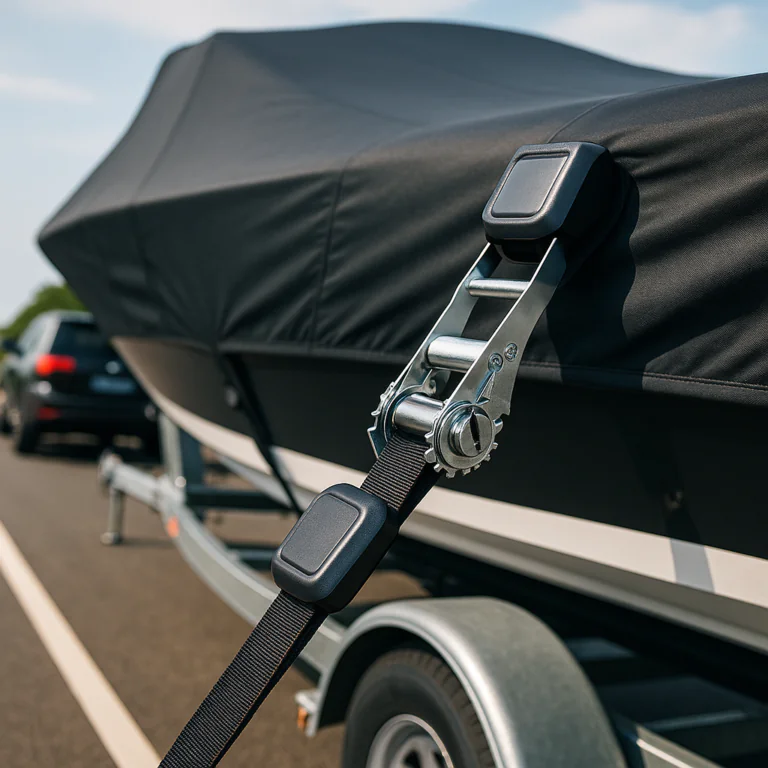
Anchoring, tie-downs and trailer-friendly designs
Trailering requires reinforced tie points, aerodynamic fit, and straps rated for speed. Use straps with proper working load limits, route straps through designed grommets, and pad contact points with sacrificial chafe guards. Reinforced hems and webbing behind grommets prevent tearing under load. For frequent towing choose designs with integrated travel skirts and secure ratchet systems to keep tension consistent.
Preventing water pooling, sail/flap protection, and wind-snag solutions
Water pooling shortens cover life and stresses seams. Use support poles, cross-rod systems, or telescoping poles to create positive drainage angles. To prevent flapping, orient buckles so they tighten with airflow, install reflective straps for night visibility, and consider elastic hems that hold without cutting into gelcoat. Common mistakes include leaving sagging areas and using non-rated straps that fail under wind load.
Expert tip: add a support pole at the bow and a cross-rod midship to eliminate the most common pooling zones.
Care, Cleaning, Repair & Seasonal Storage
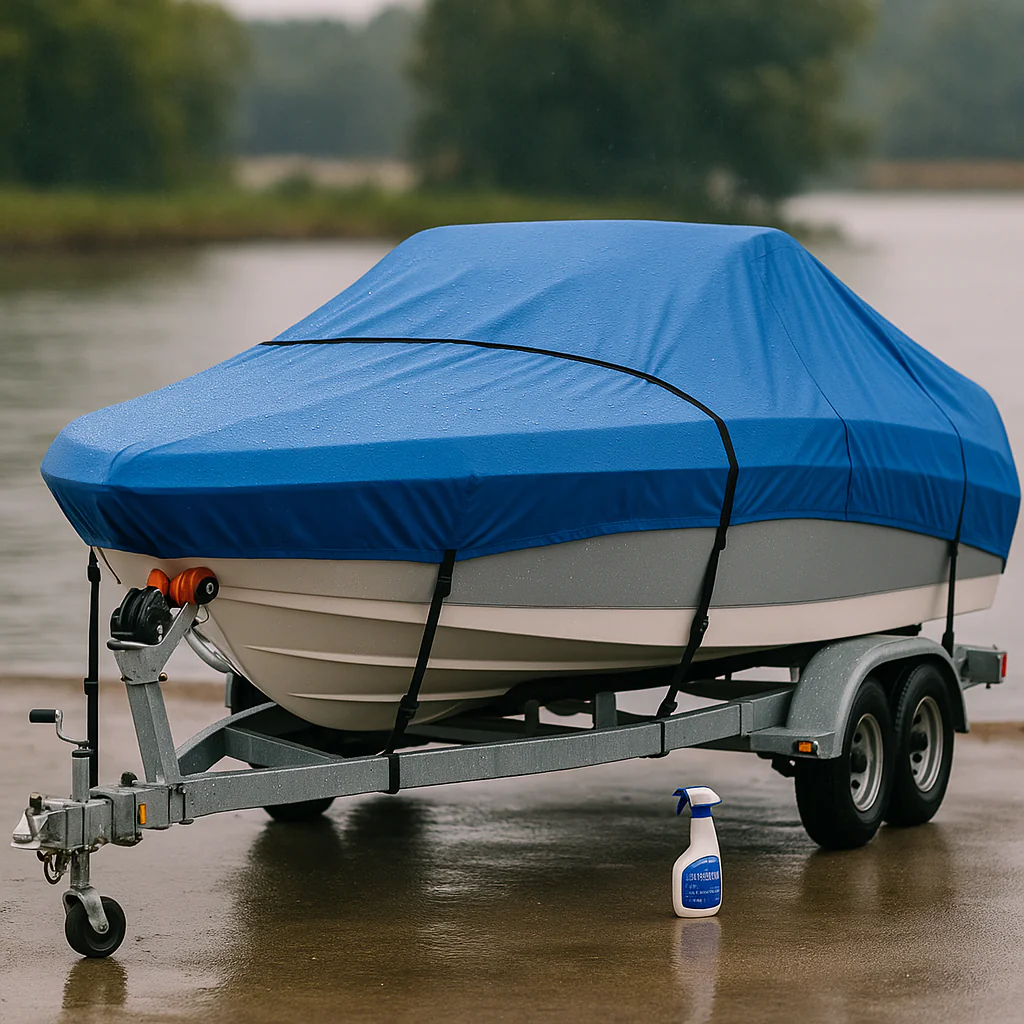
Cleaning products and methods safe for waterproof fabrics
For routine cleaning use mild soap and fresh water, a soft brush, and rinse thoroughly. Avoid bleach, harsh solvents, or high-pressure washers close-up that strip coatings. Spot-clean stubborn stains with manufacturer-recommended cleaners after a patch test. Always follow fabric-specific directions for reproofing sprays; test compatibility before full application. Non-bleach cleaners and soft brushes preserve coatings and UV inhibitors.
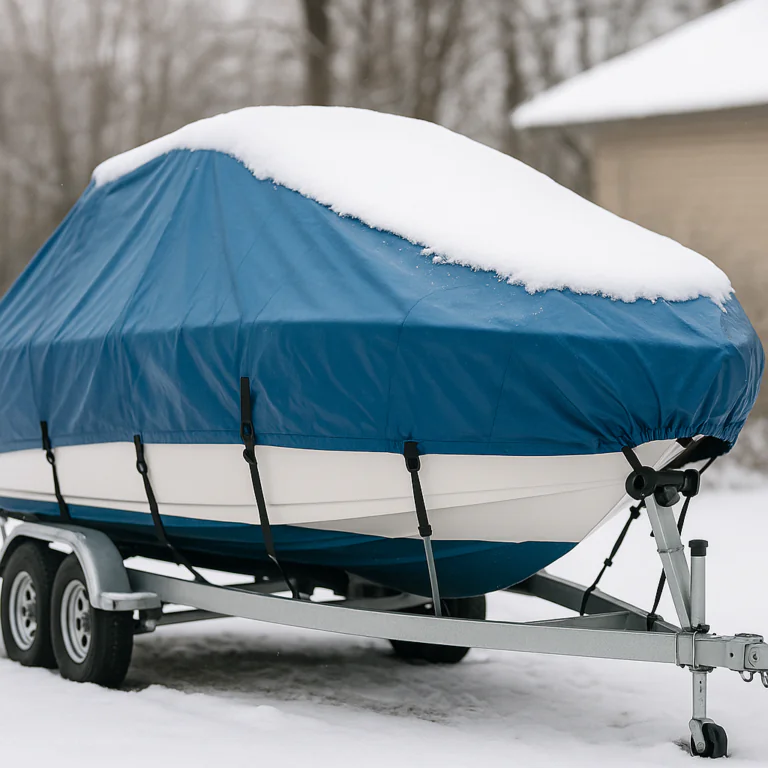
Drying, ventilation and mildew prevention
Dry covers completely before folding. Use vents and leave room for airflow during storage. Avoid packing wet covers into plastic bags—store in a breathable sack or mesh bag. Inspect stored covers seasonally for mildew and treat early. If mildew appears, clean promptly with manufacturer-approved solutions and air-dry fully in sunlight if possible.
Quick repairs: patching seams, replacing grommets and straps
Small tears in PE or PVC can be patched with adhesive or heat weld kits; stitched seams often need seam sealer applied along the stitch line. Replace corroded grommets and worn straps immediately to avoid cascading failures. Keep a small repair kit with patches, seam sealer, spare straps, and grommets in your gear bag for quick roadside fixes.
- Repair checklist: inspect seams, grommets, straps, UV-degraded areas.
Maintenance tip: photograph repairs and wear areas to track progression and support warranty claims.
Buying Guide, Cost, Warranty & Where to Buy
Price ranges and value by material and fit
Expect budget universal tarps to be the cheapest with lifespans under 2–3 years. Mid-range semi-custom covers with taped seams and 600–900D fabrics generally last 3–6 years. High-end custom covers with solution-dyed acrylic and reinforced hardware can last 7–10 years with proper care. Balance cost with intended use: frequent trailering and harsh climates justify higher upfront cost for longer life and fewer repairs. Consider long-term value, not just sticker price.
Warranty types, return policies and what to inspect on arrival
Warranties vary: common cover protections include fabric failure, seam failure, and UV rot. Typical lengths range from 1–3 years. Inspect new covers on arrival—check seams, grommets, strap hardware, and fit against your measurements. Register purchases and keep receipts and photos to streamline claims. For manufacturer terms consult the warranty details.
Custom orders, lead times and when to choose professional installation
Custom covers take time—order well before winter. Request fabric swatches if available and photograph installation steps for warranty proof. Choose professional installation for complex boats with electronics, towers, or unusual profiles to avoid measurement errors and improve long-term performance.
- Pre-purchase checklist: measurements, intended use, climate factors, accessories needed.
Conclusion
To summarize: pick a waterproof material suited to your climate and storage method, measure carefully, prioritize seam quality and ventilation, and maintain covers with gentle cleaning and prompt repairs. Use the measurement checklist and consult official guidelines like NOAA climate data and the National Weather Service forecasts when planning storm prep. Follow the simple decision flow: if you store uncovered choose heavy-duty waterproof with taped seams; if you trailer frequently choose reinforced polyester with ratchets; if you need long-term enclosed storage choose breathable solution-dyed acrylic with vents. Avoid the top pitfalls: poor fit, wrong material, and wet storage—address them early and your cover will protect your boat for seasons to come.
- Printable checklist: measure, order, inspect on arrival, install with supports, clean and store dry.
- Top 3 pitfalls: poor fit, wrong material, storing wet.
Frequently Asked Questions
What is the best waterproof material for boat covers?
The best waterproof material for boat covers is heavy-duty marine-grade polyester with a PVC coating or a polyurethane (PU) finish. These coated fabrics give you a reliable balance of water resistance, weight, and durability for regular use and storage. You should look for a denier and weight appropriate to your boat—heavier fabrics resist wind and abrasion better—plus taped or welded seams to stop leaks. For long-term sun exposure, choose materials with UV resistance and mildew treatment; if you need breathability to limit condensation, consider a cover with an internal breathable membrane or vents to allow air exchange while keeping rain out.
How to keep moisture out of a covered boat?
To keep moisture out, dry the boat thoroughly, use a snug cover with good support, and provide airflow and moisture control. Start by removing wet cushions and wiping surfaces; then fit a cover that seals at the gunwales but uses raised support poles to prevent water pooling. Ensure proper ventilation with vents or a breathable fabric to allow vapor diffusion, which reduces condensation. Place desiccants or moisture absorbers in lockers and the cabin, and use a small dehumidifier or solar vent if you can. Regularly inspect seams and attachment points, and air the boat periodically during storage to expel trapped humidity.
Boating Enthusiasts — Join the Crew!
Free Boat Protection Guide Download Yours Now
Get your free copy of The Complete Boat Protection Guide — expert tips, real-world strategies, and exclusive insights from the Safeboatz team.